Along with being made available in Liquid State Ubiquity, Google Play In-App Purchases (IAPs) must be set up in the Google Play Developer Console.
Before creating your IAP in the Google Play Developer Console, ensure you have followed the instructions listed in Creating How to: Create In-App Purchases.
| Info |
|---|
You do not need to submit free downloadable content to Google Play. Only paid IAPs must be configured in platform developer portals. Google Play refers to IAPs as In-App Products, rather than in-app purchases. |
Create a Google Play IAP
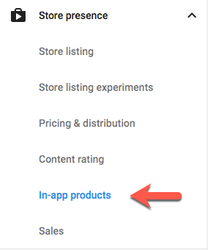
To add an IAP to your Android app, log in to the Google Play Developer Console.
Under All Applications, click on your app.
Click through to the the In-app Products tab.
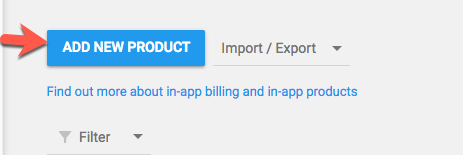
Click the + Add new product button.

Under What type of product would you like to add? select Managed product.
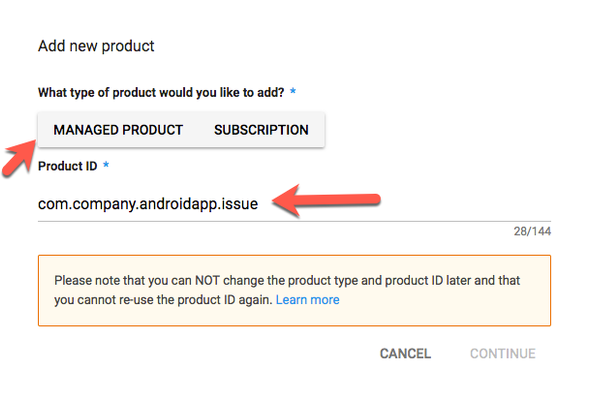
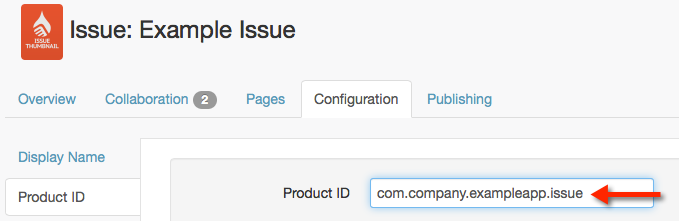
The Product ID you enter here must match the product ID in your issue's configuration in Liquid State Ubiquity.
You cannot change the product ID once you have created your IAP in Google Play. We recommend copying and pasting the product ID from your Liquid State Ubiquity account directly to this field.
Click the Continue button.
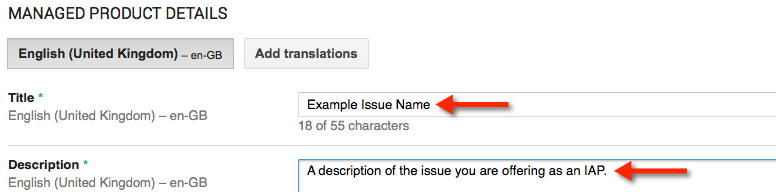
You will then add product details for your IAP. These details should be entered in your app's primary language. You can add translations by clicking the Add Translations button.
Enter a Title and description for your IAP. This should be the name and description of your issue.
Under the Pricing heading, enter the Default Price for your IAP, in the default currency.
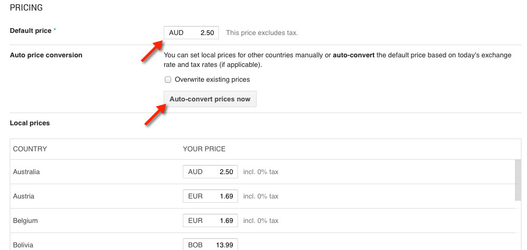
You can click the Auto-convert prices now to automatically define IAP pricing in other regions.
Alternatively, you can choose to manually enter pricing for different regions, in different currencies.
Check you're happy with the details you have entered, and save your progress by clicking the Save button towards the top of the page.

Your IAP will be saved, in Inactive status. Once you're ready to publish your IAP, click the Inactive button, and choose Activate.

Your IAP will be published to your Android app.