Versions Compared

Key

  • This line was added.
  • This line was removed.
  • Formatting was changed.


In order to send push notifications with OneSignal you must have a OneSignal account. The instructions below will instruct you on how to create a OneSignal account, setup Push Notifications for both iOS and Android, 


Anchor
Creating a OneSignal Account

Expand
titleCreating a OneSignal Account


  1. Go to onesignal.com. From the OneSignal site, click on Login in the top right-hand corner


    If you are a returning user, use your existing credentials to login to your OneSignal account. You can create multiple app entries under the same account.

  2. If you need to create a new account click the Sign Up button down the bottom of the pop-up window


  3. Fill in your details and Confirm your account

  4. Once your account has been confirmed you can login to your OneSignal account and begin setting up push notification for iOS and Android.

Anchor
Adding a new app
Adding a new app

Expand
titleAdding a new app


  1. Go to OneSignal website

  2. Click Login. If you have a OneSignal account you should login - if not register an account.


  3. Once logged in - you will be able to Add a New App. Click Add a New App.


  4. Name your app appropriately and click Create


  5. You have now created a new app entry to send push notifications to. You can now configure your app for Apple and Android push notifications. You may close the pop-up screen or continue.


Expand
titleiOS: Production .p12 creation

Anchor
iOS: Production .p12 creation

To enable iOS push notifications, you must export your iOS push notifications certificate as a production .P12 file, then upload this file to OneSignal.


Info

If you haven't already created your iOS push notifications certificate, see the the relevant instructions in iOS Certificates, Identifiers, and Profiles.

You can only modify your push notifications certificate on the Mac computer it was originally created on.

Exporting your Push Notifications Certificate as a .P12

  1. After creating your push notifications certificate and adding it to your Mac computer's Keychain, open the Keychain Access application.

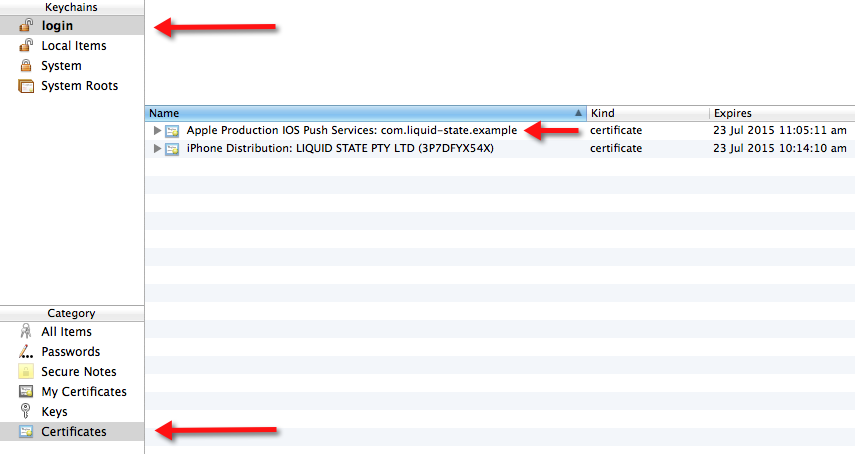
  2. Select the login keychain, and the Certificates category. Identify your push notification certificate.
    The certificate should be identifiable by its name, and the date on which it expires (one year after creation).


  3.  Hold the control key and click on your push notifications certificate. In the menu that appears, choose to Export your certificate.


  4. Save the exported certificate as a .P12 file type. This is extremely important, as parse.com will only read .P12 files. As per usual practice, save the .P12 file with an easily identifiable name, in a memorable location.

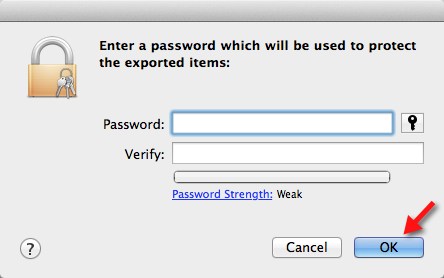
  5. Next, two dialogue boxes will appear. In the first box, you will be asked to create a password to protect your .P12 file – do not enter a password here.

    Leave both fields blank and click the OK button. Again, this is extremely important as parse.com will not be able to access your certificate if you enable password protection.

     
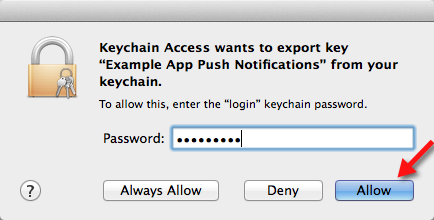
  6. The second dialogue box will ask for your computer's system user password. Go ahead and enter your password here, then click Allow to finish exporting your certificate as a .P12.


    You now have a modified .P12 certificate.

    Next, you will upload this file to OneSignal.
Expand
titleiOS: Setup for OneSignal

Anchor
iOS: Setup for OneSignal

  1. Login to OneSignal.com

  2. Select your app entry

  3. Click App Settings along the left-hand tab
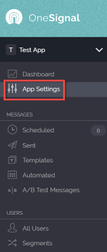


  4. Select Configure for Apple push notification configuration


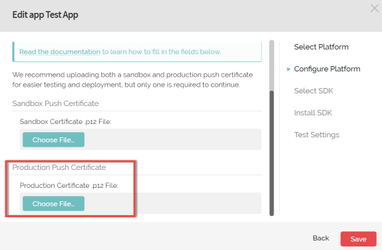
  5. You will be taken to a new screen with the option to upload a Sandbox .p12 or a Production .p12. Upload a Production .p12 file. You may ignore the Sandbox .p12 option.


    If you haven't created a .p12, see the previous step on Creating a Production .p12

  6. Upload the Production .p12 and click Save

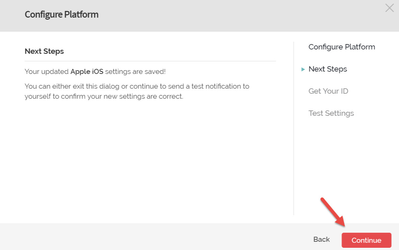
  7. Click Continue on the next screen


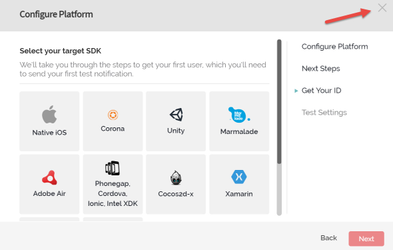
  8. The following steps will be regarding Apple SDK which you may click Native iOS and click Next.

  9. The rest of the process can be ignored as all your settings have been configured. You may close the tab.


  10. Your iOS OneSignal configuration is complete. You may refresh your browser to see the changes applied to your Apple Configuration.


  11. The next step is to configure your app in Ubiquity (Liquid State Cloud) so you can send Push Notifications. You should keep this tab open in your browser or copy the keys as you will need these for Ubiquity Configuration.
Expand
titleiOS: Ubiquity (Liquid State Cloud) Configuration

Anchor
iOS: Ubiquity (Liquid State Cloud) Configuration

  1. Login to your Liquid State account

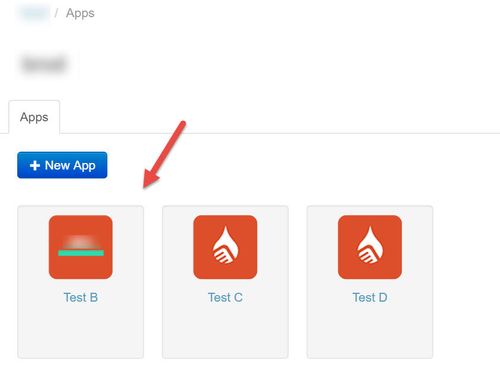
  2. Click on the app you're going to configure


  3. Click on Configuration followed by the Apple logo to access configuration for your iOS app.


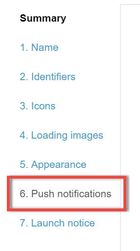
  4. Once inside your Apple Configuration, navigate along the side-tab and click Push Notifications

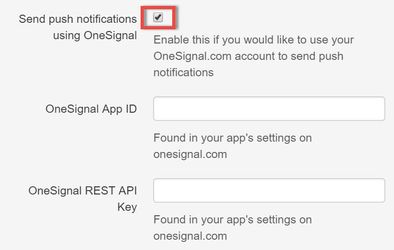
  5. Select the box Send Push Notifications using OneSignal


  6. Open OneSignal.com in your browser and log back in

  7. Click on the app entry that you're planning to configure


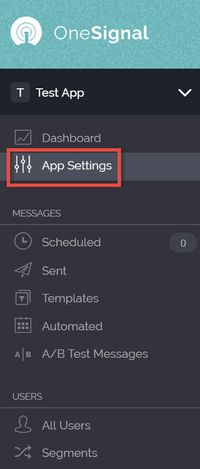
  8. Click on App Settings along the left-hand tab


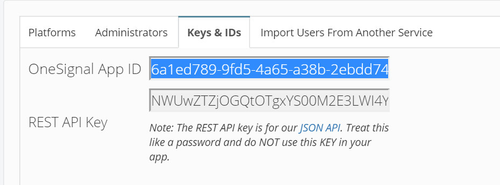
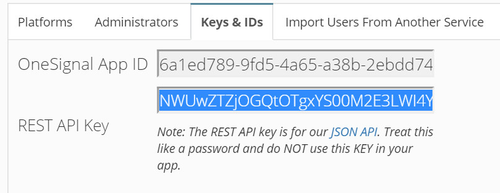
  9. Click on Keys & IDs after clicking App Settings to access your automatically generated OneSignal App ID and REST API Key


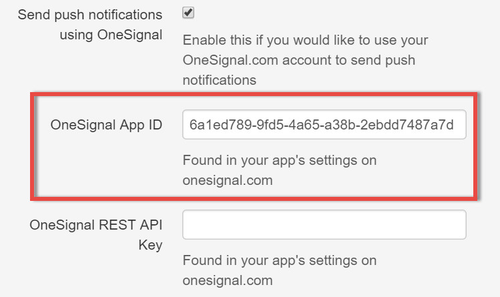
  10. Copy the OneSignal App ID and paste into the matching section on Ubiquity/Cloud


  11. Copy the REST API Key from OneSignal to Ubiquity/Cloud


  12. Your configuration is complete for iOS Push Notifications. Hit Save & Continue to finish.

You can now send Push Notifications using OneSignal. If you need to configure Push Notifications for Android, you may continue below.


Expand
titleAndroid: Setup & Configuration for OneSignal

Anchor
Android: Setup for OneSignal

OneSignal also works on Android devices. Make sure you have followed the steps in Creating a OneSignal accountbefore completing the Android configuration.

  1. Login to OneSignal.com

  2. Select your app entry

  3. Click App Settings along the left-hand tab


  4. Select Configure for Android push notification configuration


  5. You will be required to provide Google Server API Key and Google Project Number.
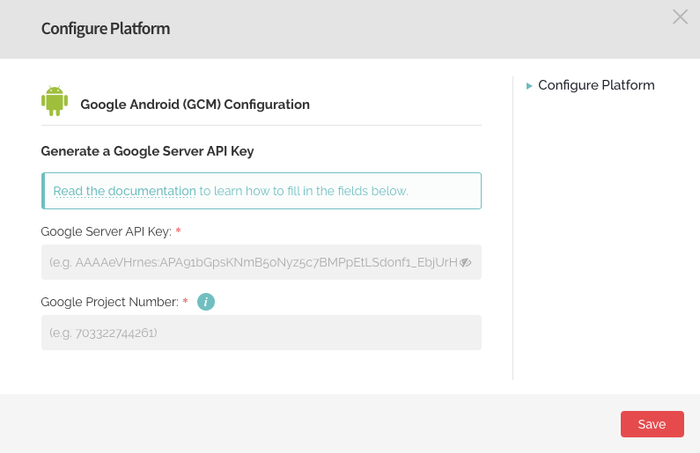


  6. Open Firebase Console to obtain your Google Server API Key and Google Project Number.

  7. Once signed-in, you will be taken to a screen to begin filling out your app details. Your App Name should match the app name in Ubiquity and OneSignal.

  8. Open your desired project (Application) and click on the settings icon.

  9. Click on Project Settings and then proceed to select Cloud Messaging


  10. Copy and paste Server Key and Sender ID from Firebase into your OneSignal account. Click Save to complete your OneSignal configuration.
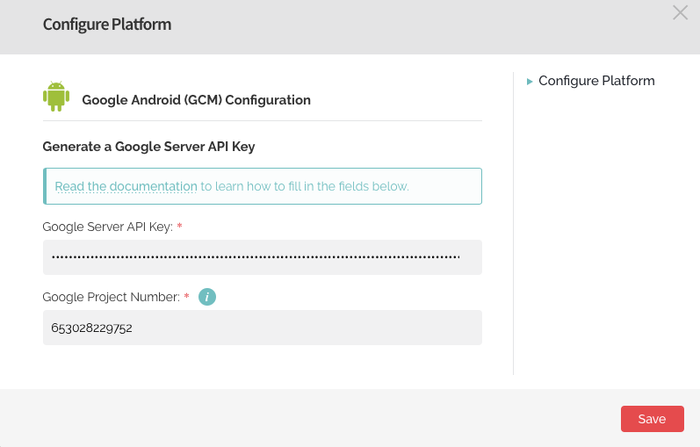


  11. Open your Ubiquity (Liquid State Cloud) account and click on your app entry. Click on Configuration > Android > Push Notifications as shown below
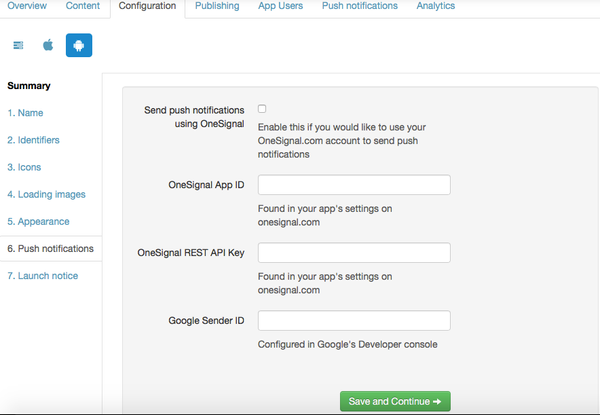


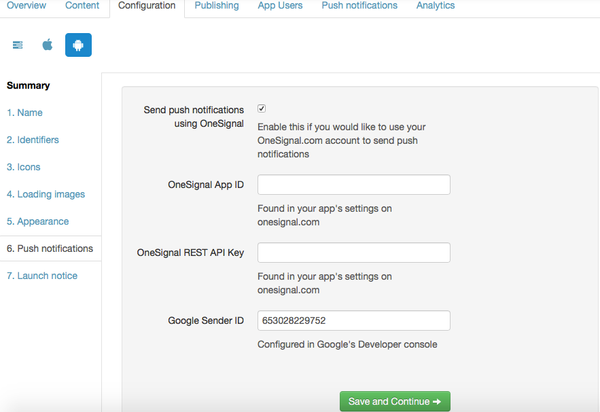
  12. Select Send Push Notifications using OneSignal. This will allow you to send push notifications to your Android app.


  13. Copy and Paste your Google Project Number (Firebase) into the field of Google Sender ID (Ubiquity) into your account.


  14. Navigate back to your OneSignal accountand click App Settings

  15. Click Keys & IDs


  16. Copy and Paste OneSignal App ID and REST API Key into the Ubiquity.
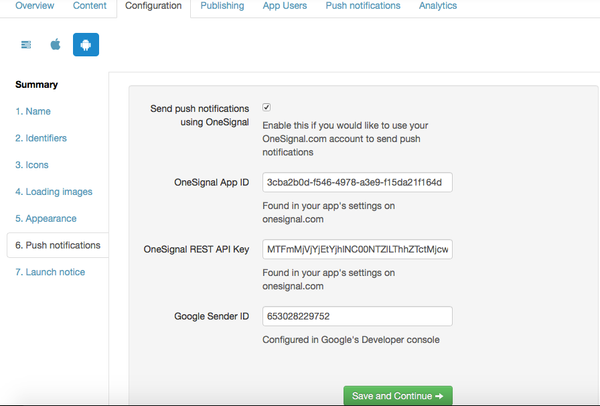


  17. Click Save and Continue to complete your Android Push Notification configuration

You have now configured your Push Notifications for Android. View instructions for iOS OneSignal configuration or view How to Send Push Notifications.