Contents
| Table of Contents |
|---|
This section outlines Patients information. This can only be accessed by Hospital Admin and Professional Users.
1: Patient Overview
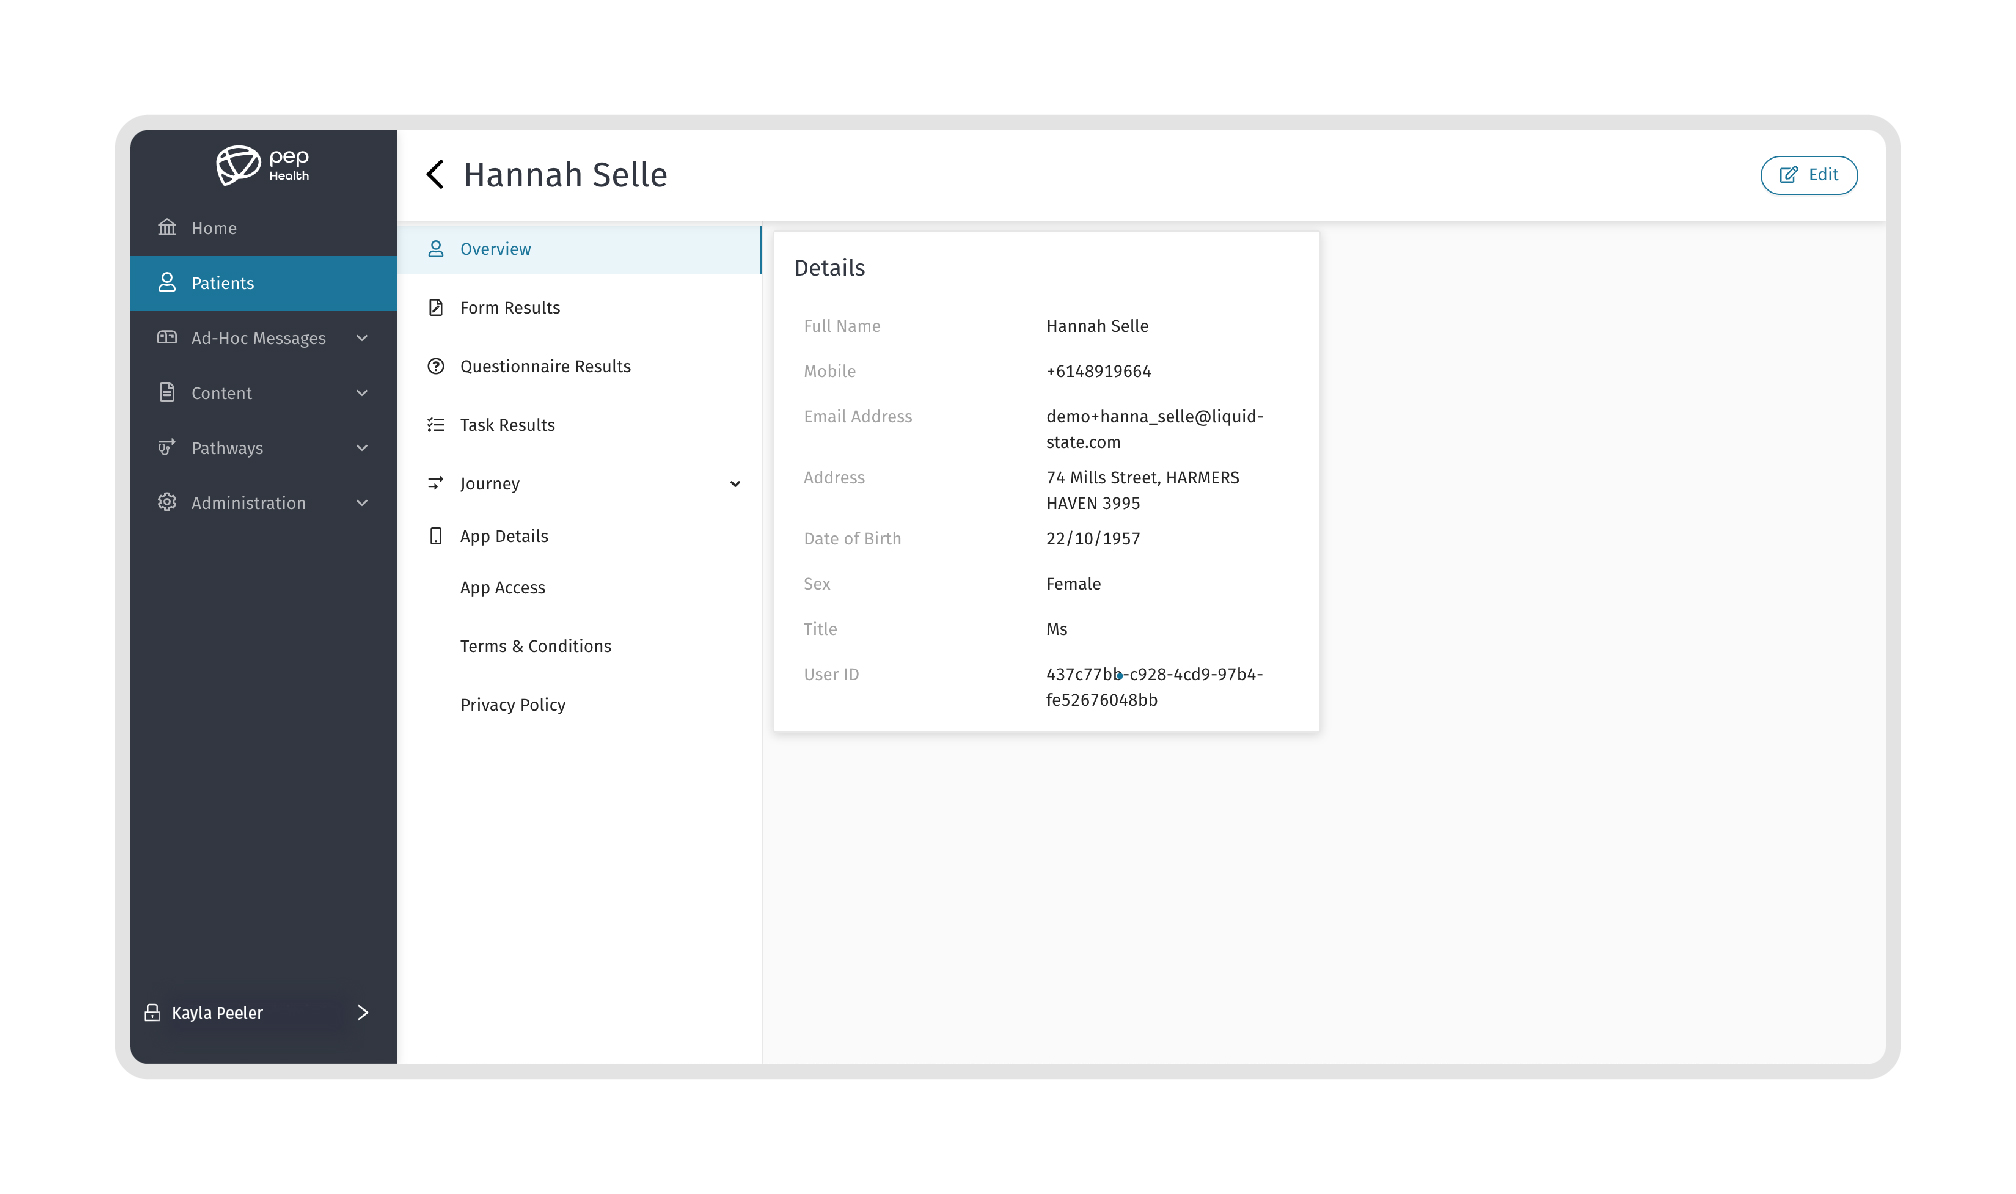
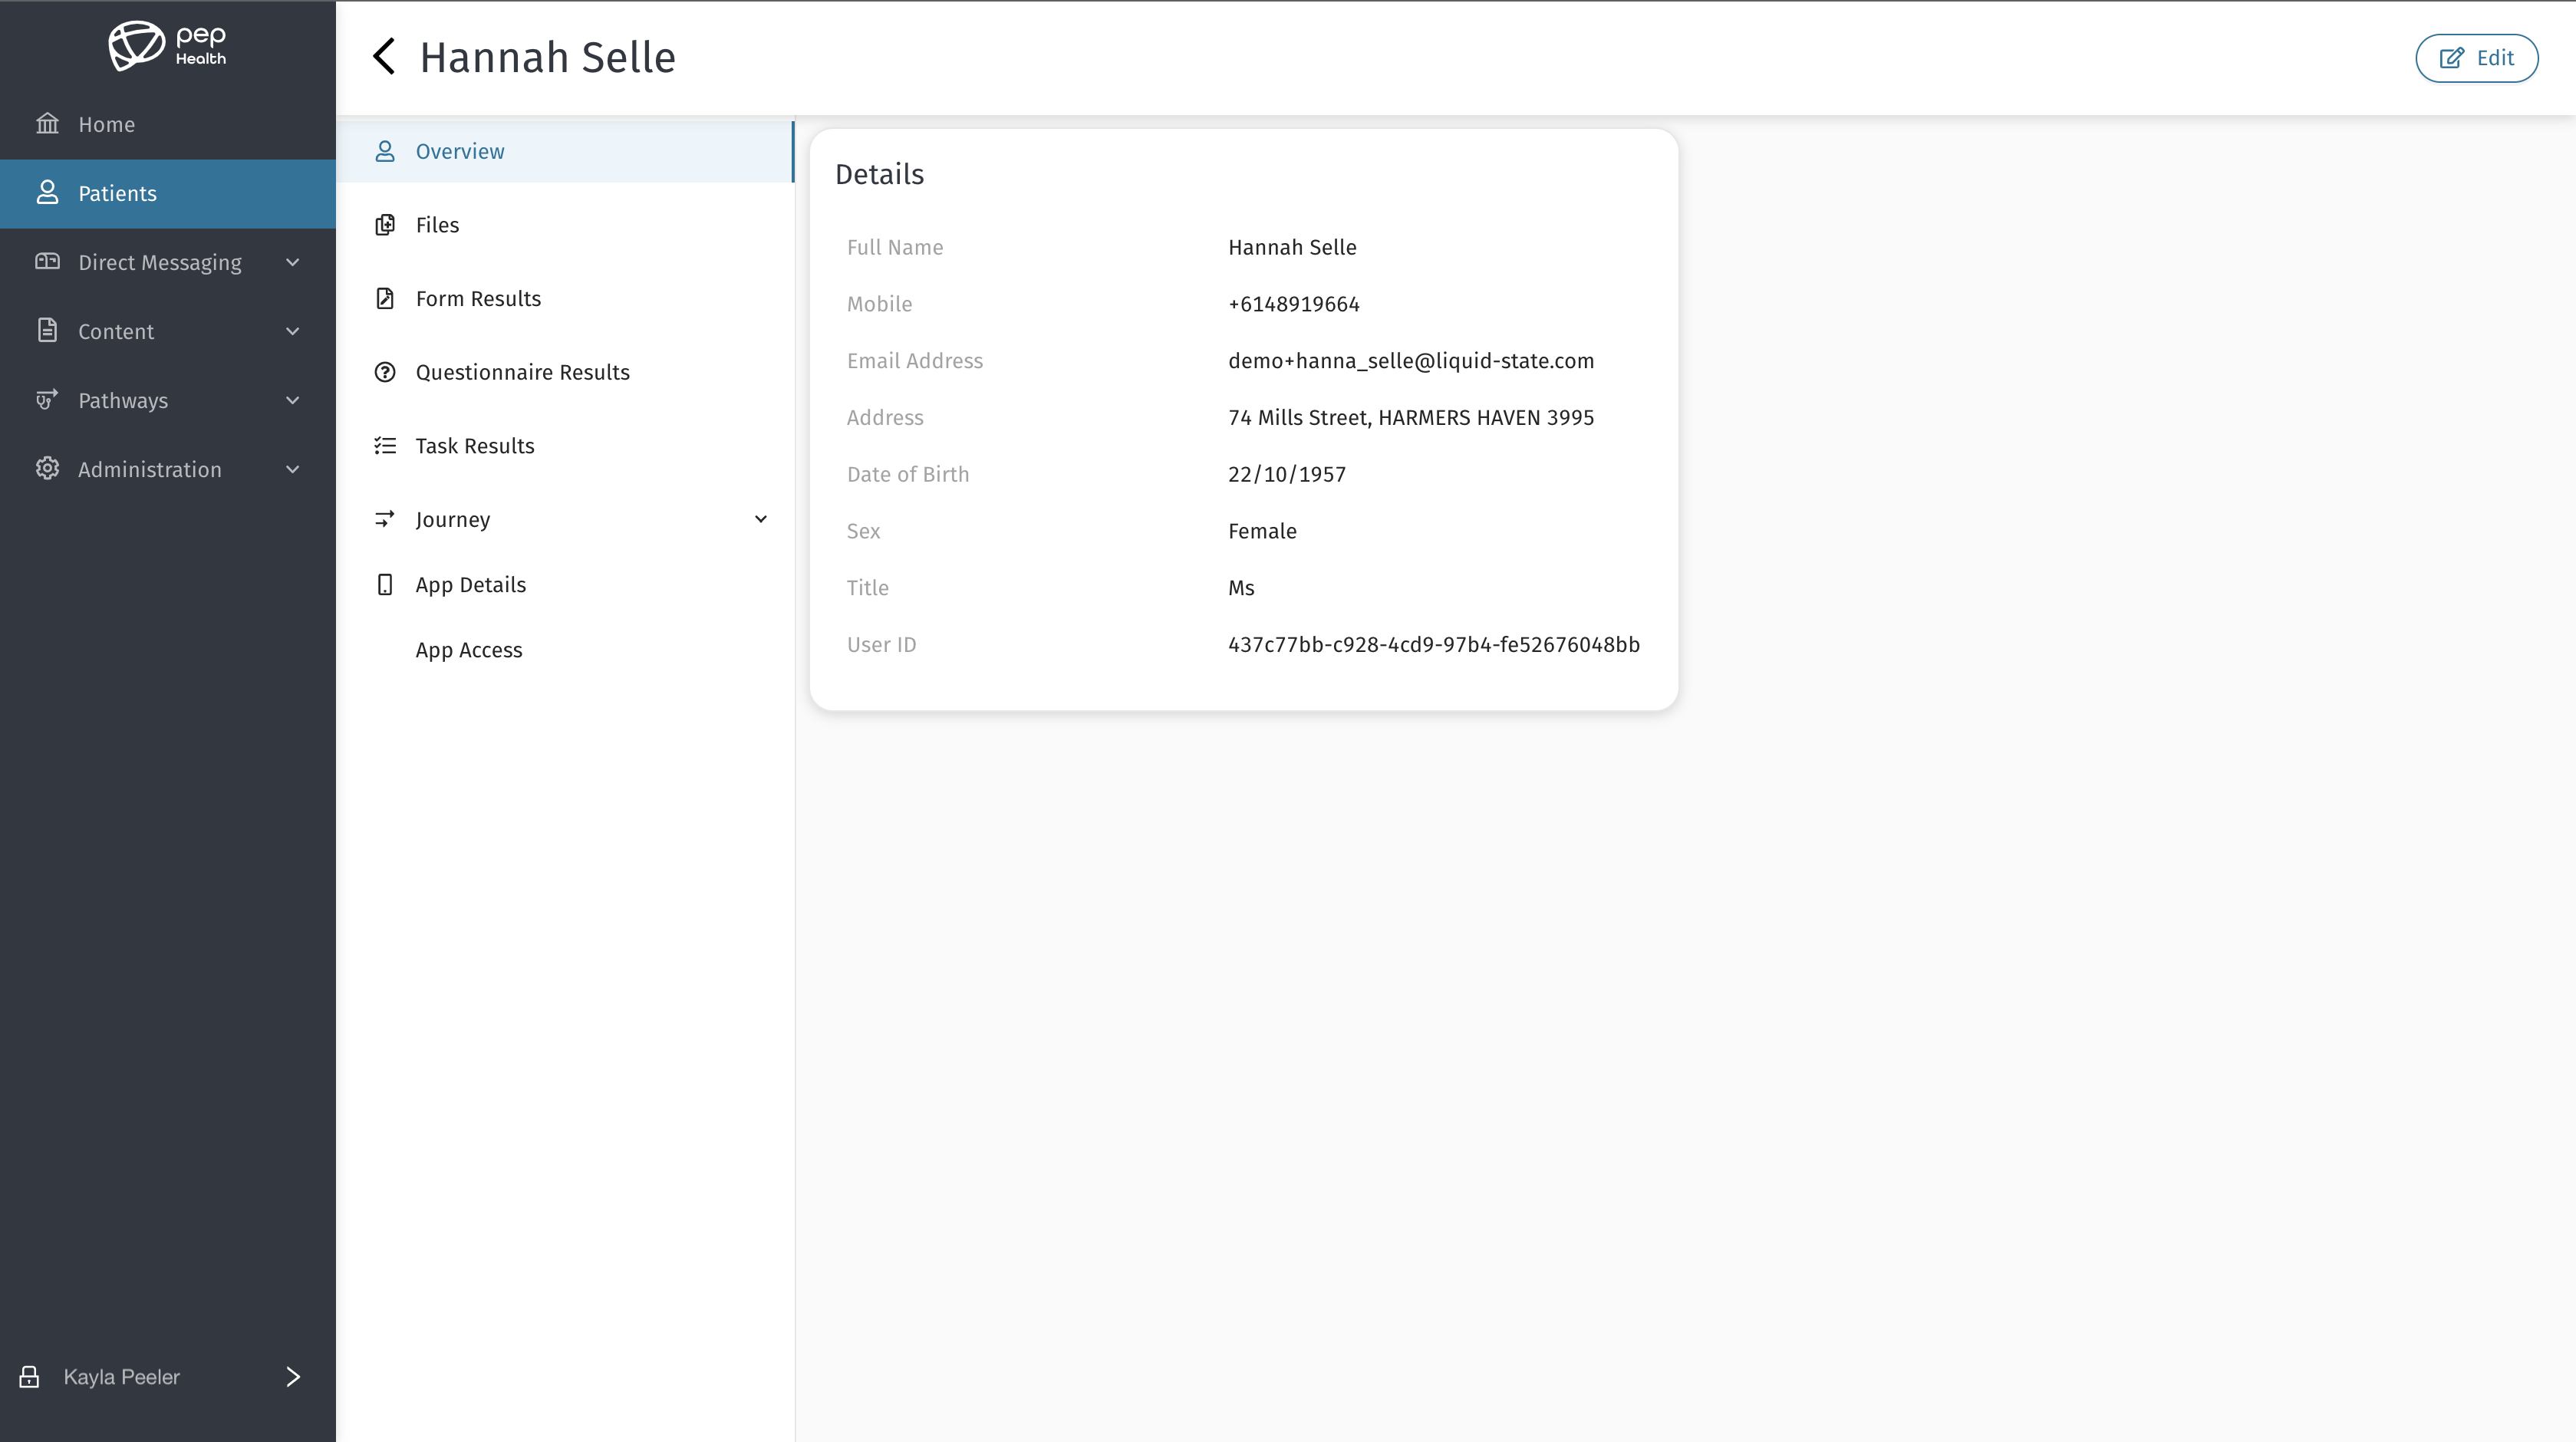
Select “Patients” in the left menu panel on the Dashboard. Click “Overview” to view the details of a Patient including name, contact, and address.
2: Files
Select “Files” from the inner menu to view a list of files shared by you to that Patient and vice-versa. You can edit any file’s details, remove/delete a file shared by you to that patient and preview any file for review. More information on sharing and management of “Files” can be found here - https://liquidstate.atlassian.net/wiki/spaces/PDKB/pages/2839543814/Files+Sharing+and+Management
Add a new File to this list by clicking on the “+” icon in the top-right corner. Enter the information required, and click “Save”. The file is automatically shared with the patient and they can view it in the ‘Files’ section of the PEP Health app.
3: Form Results
Select “Form Results” from the inner menu to view a list of forms submitted by that Patient. You can review the Patients responses and calculate the results accordingly.
Add a new form to the Patient’s profile by clicking on the “+” icon in the top-right corner. Enter the information required, and click “Submit”.
4: Questionnaire Results
Select “Questionnaire Results” from the inner menu to view a list of questionnaires submitted by that Patient. You can review the Patients responses and calculate the results accordingly.
Add a new questionnaire to the Patient’s profile by clicking the “+” icon in the top-right corner. Enter the information required, and click “Submit”.
5: Task Results
Select the “Task Results”option from the inner menu to view a list of tasks submitted by that Patient. You can review the Patients responses and calculate the results accordingly.
Add a new task to the Patient’s profile by clicking on the “+” icon in the top-right corner. Enter the information required, and click “Submit”.
6: Journey
Select the “Journey” option from the inner menu to view the Patient’s Pathways, and all Index Events that belong to that Pathway.
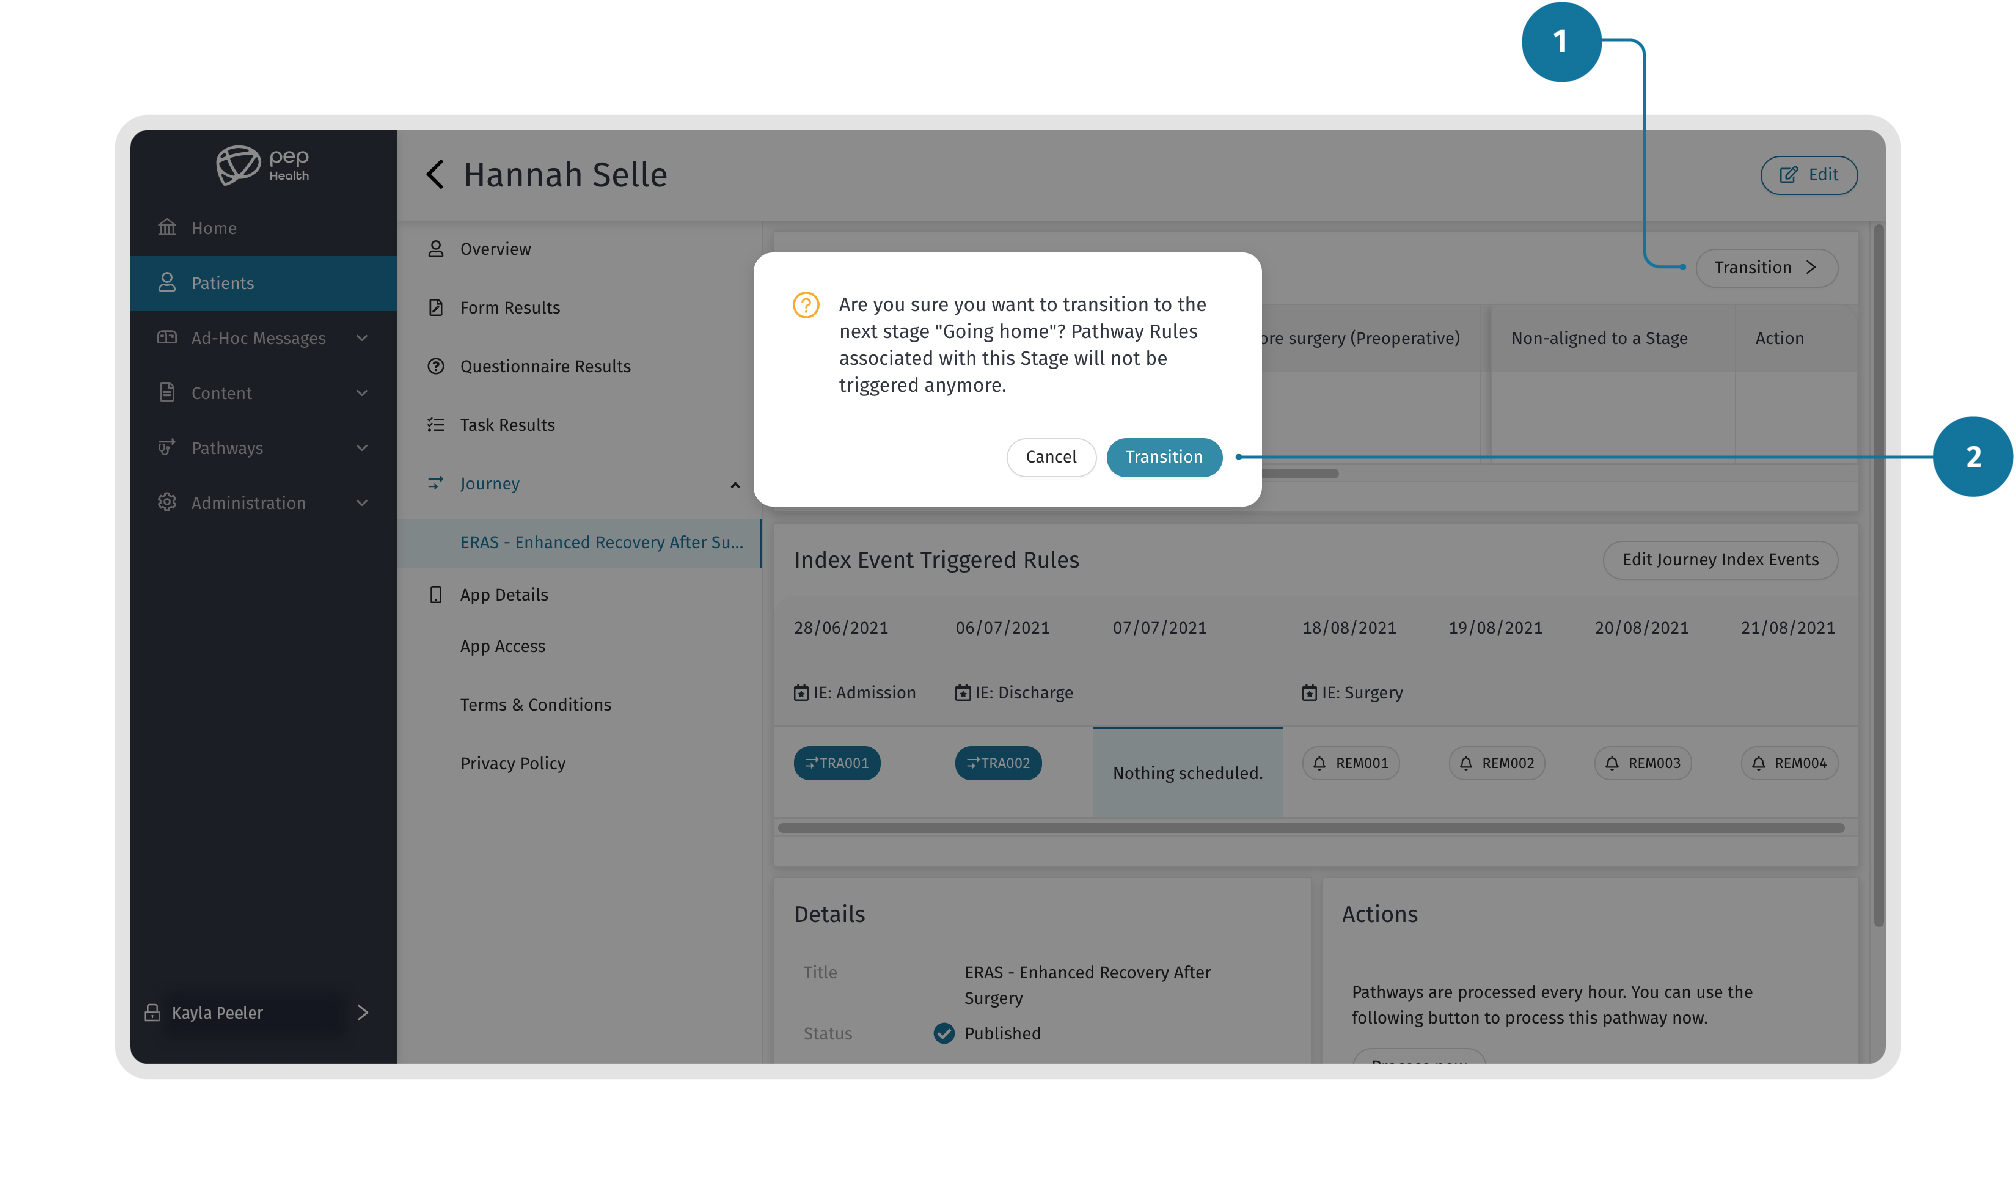
This section is non-editable. The “Transition”button allows you to progress Patients to the next Stage.
Note: the Transition of this Stage will not trigger the Rules in the current stage. The “TRIGGER”button allows you to trigger the Rule action manually.
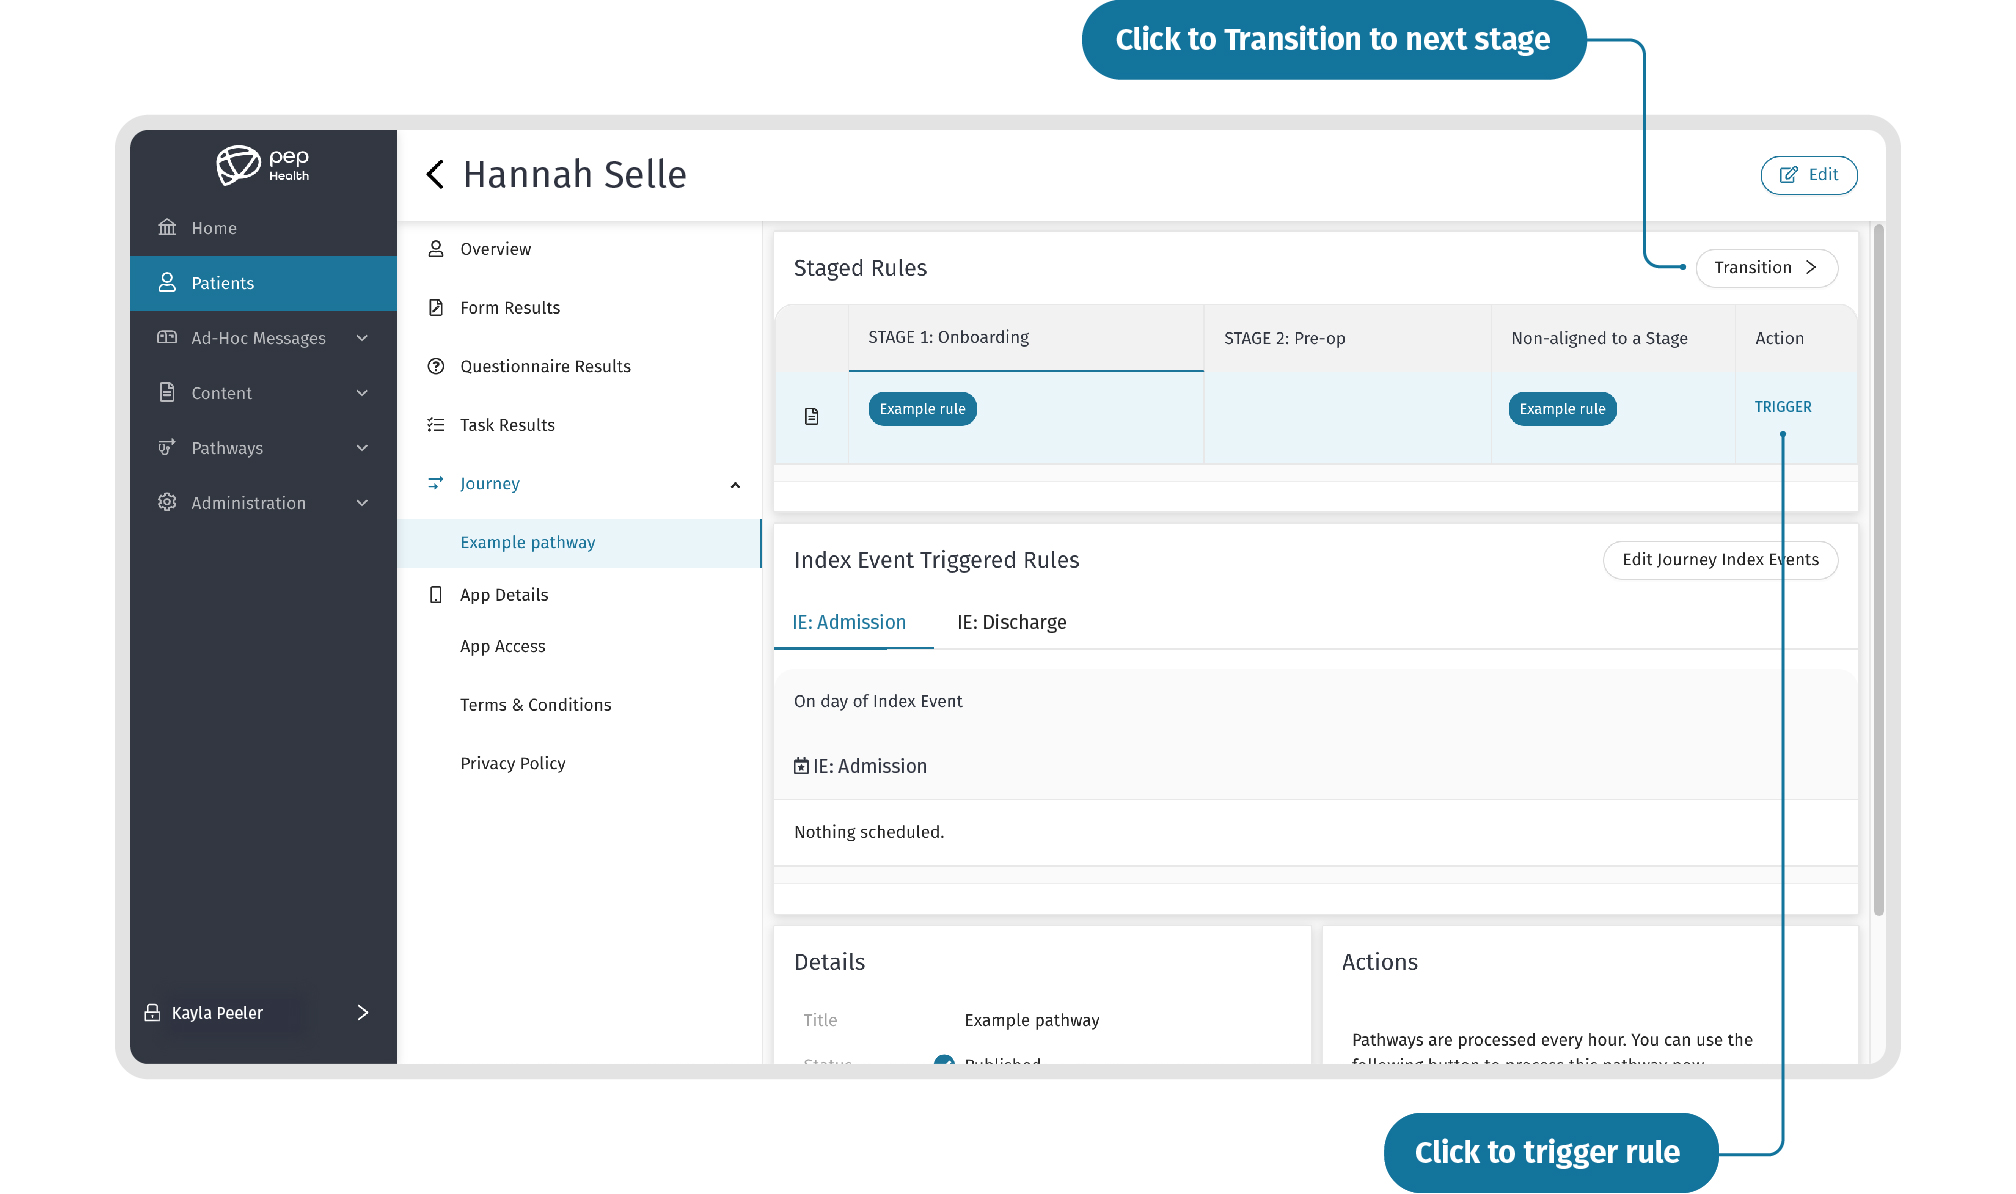
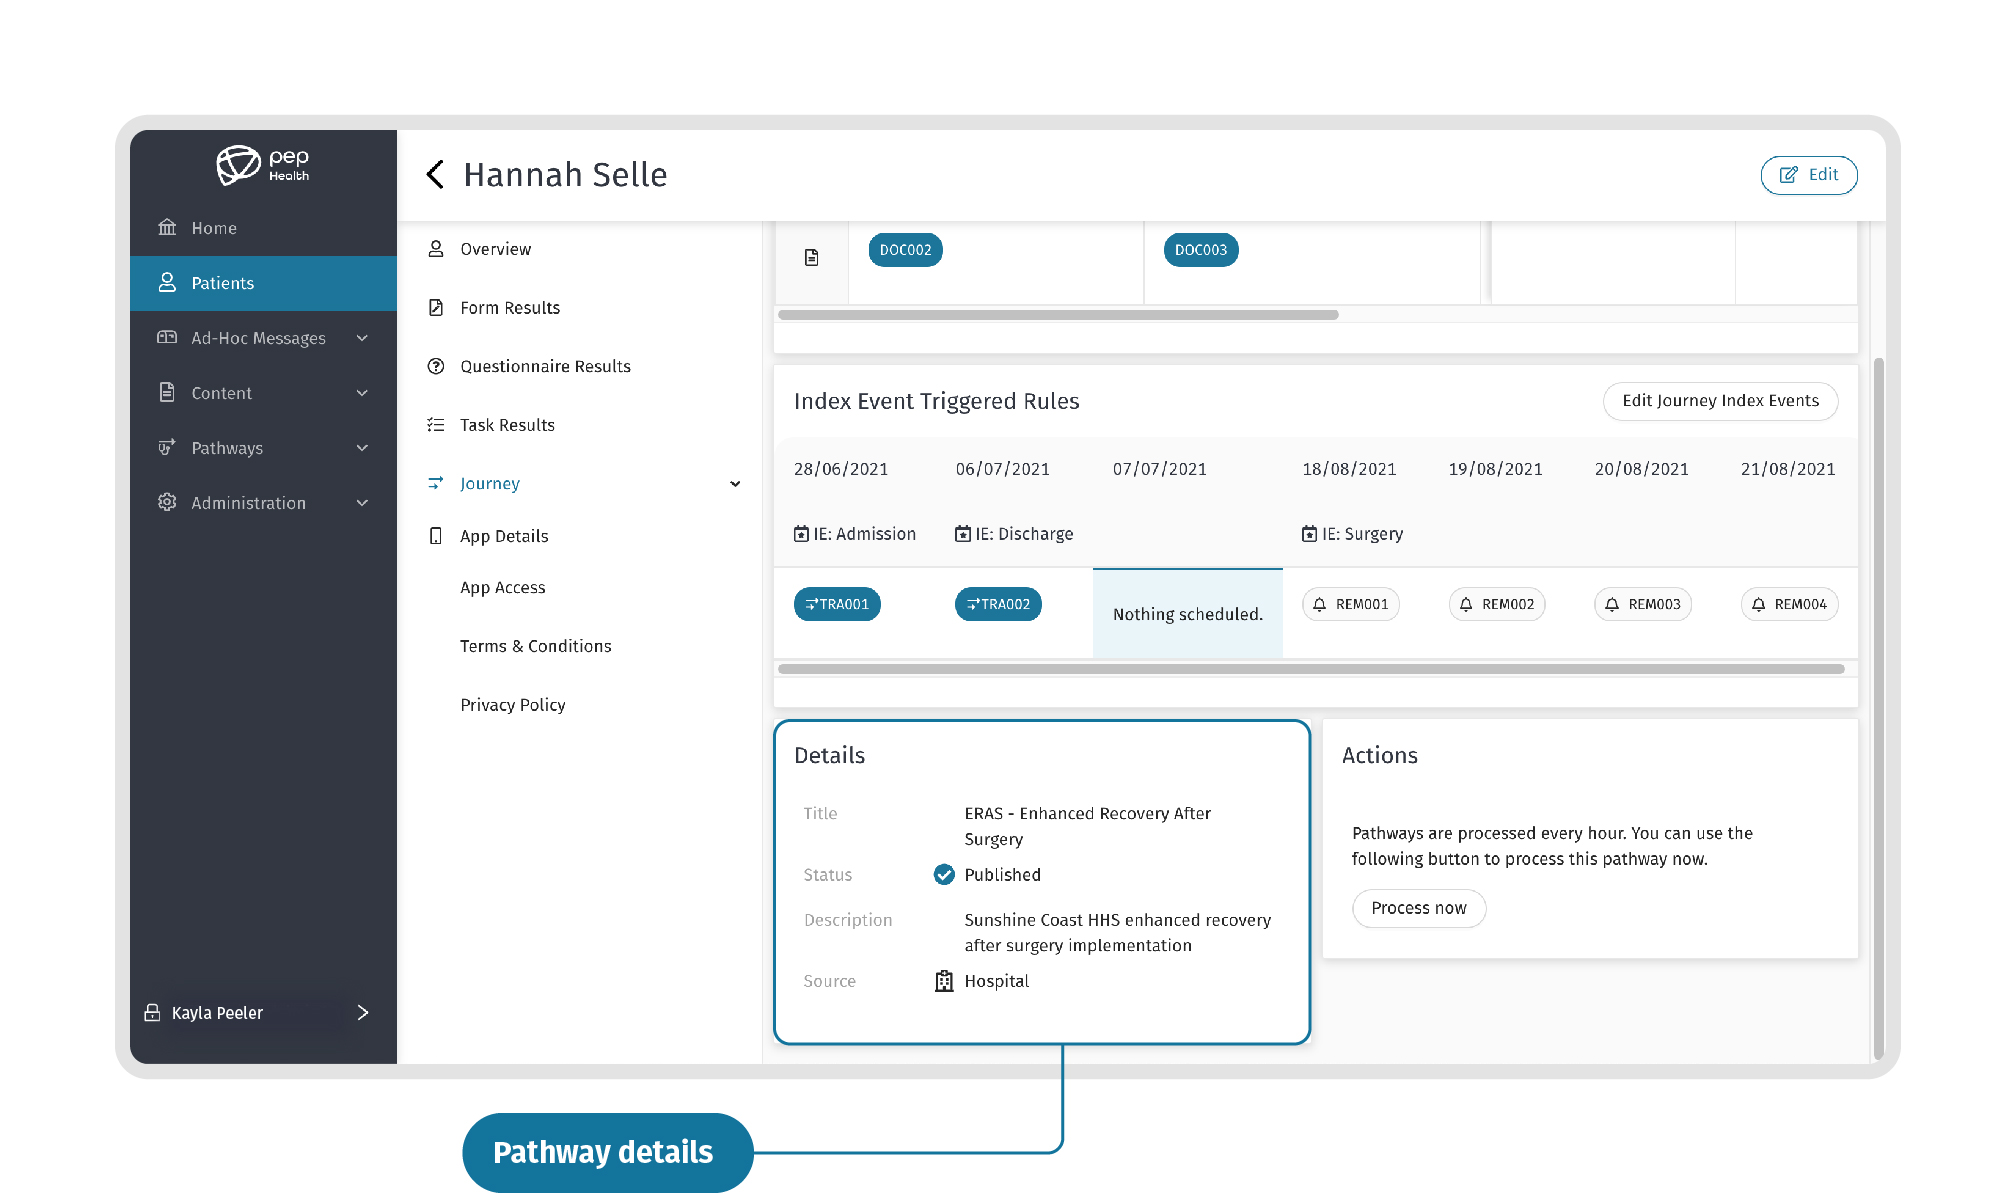
Click on the “Edit Journey Index Events” to view and edit the selected Patients Journey Index Events. Here you can change the date for the Index Events or add Pathways, and save any changes.
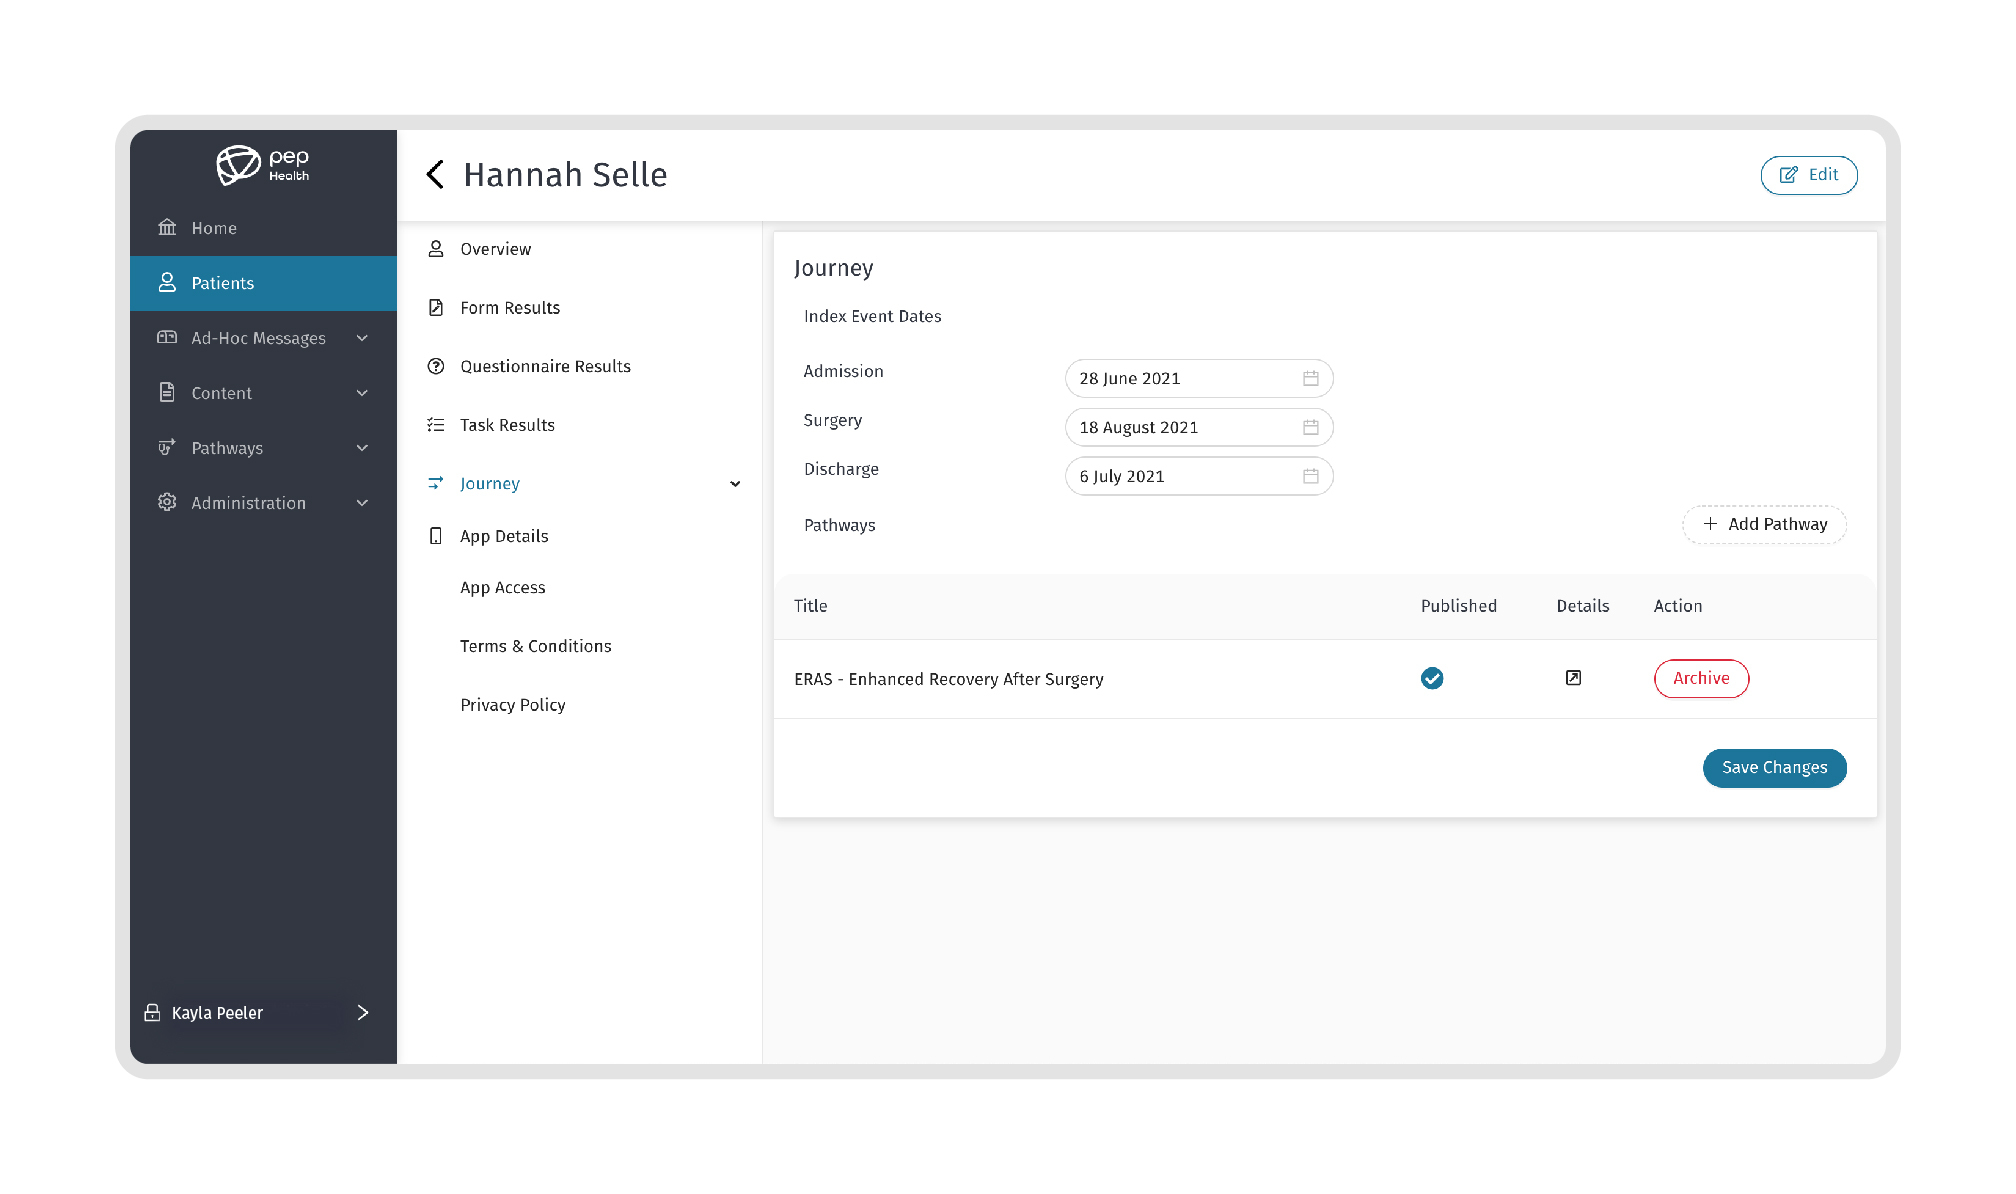
You can also view the details of the Pathway assigned to the Patient.
7: App Access
Here you can send an app invitation to an unregistered Patient by using the “Resend Invite” button. A Patients account can also be activated/ deactivated using the toggle button.
8: Terms & Conditions and Privacy Policy
Here you can view important policy documents and a Patients Acceptance History.
Click on the “Read Mobile App Global Terms of Use” button to preview the Terms & Conditions.
Click on the “Read Mobile App Global Privacy Policy” button to preview the Privacy Policy.
9: Edit Organisation details
Hospital Admin and Professional Users have the ability to edit a Patient’s details by selecting the Patient and clicking the “Edit” button in the top-right corner. Make the necessary changes and click “Save”.
Related Articles
| Filter by label (Content by label) | ||||||||||||||||||
|---|---|---|---|---|---|---|---|---|---|---|---|---|---|---|---|---|---|---|
|
| Page Properties | ||
|---|---|---|
| ||
|