To enable iOS push notifications, you must export your iOS push notifications certificate as a production .P12 file, then upload this file to OneSignal.
Exporting your Push Notifications Certificate as a .P12
- After creating your push notifications certificate and adding it to your Mac computer's Keychain, open the Keychain Access application.
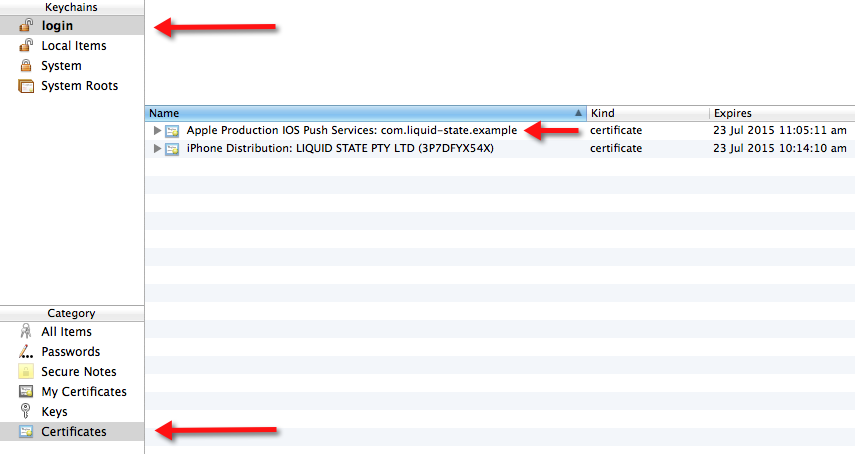
- Select the login keychain, and the Certificates category. Identify your push notification certificate.
The certificate should be identifiable by its name, and the date on which it expires (one year after creation).

- Hold the control key and click on your push notifications certificate. In the menu that appears, choose to Export your certificate.

- Save the exported certificate as a .P12 file type. This is extremely important, as parse.com will only read .P12 files. As per usual practice, save the .P12 file with an easily identifiable name, in a memorable location.
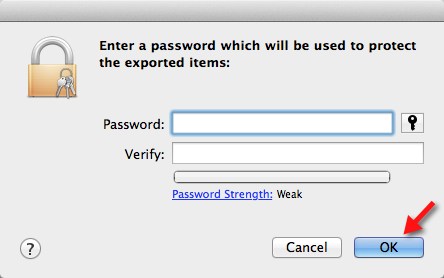
- Next, two dialogue boxes will appear. In the first box, you will be asked to create a password to protect your .P12 file – do not enter a password here.
Leave both fields blank and click the OK button. Again, this is extremely important as parse.com will not be able to access your certificate if you enable password protection.

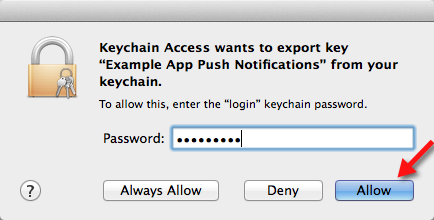
- The second dialogue box will ask for your computer's system user password. Go ahead and enter your password here, then click Allow to finish exporting your certificate as a .P12.

You now have a modified .P12 certificate.
Next, you will upload this file to OneSignal.