Contents
| Table of Contents |
|---|
...
This section provides step-by-step instructions on how to create a new Patient, and how to add Pathways to Patients.
STEP 1: Navigate to Patients from the dashboard
Select the Patients option from the menu panel on the left side of the dashboard screen.
Or you can click onthe “New Patient” icon on the homepage of the dashboard to instantly create a new Patient.
...
STEP 2: Review Patient details
You can review the details of all existing Patients from the “Individuals” list. You can view the Pathway progress of a patient here.
To display a Patients Patient details, click on the Patient that you are interested in.
From Here, the app access tab , will allow you can also to change the app access for a Patient . has to the app:
If a Patient has lost their Invite Code, you can create a new code and send it to
...
them by email. To do this click “Resend Invite”.Note, this option is only available for unregistered users.
For the registered users, you have the option to Deactivate or Activate account using the toggle button.
...
STEP 3: Create a new Patient
Click on the “New Patient”button in the top right of the individuals screen.
...
STEP 4: Add App Invite details and Administration Information
On Next, add important Patient details in the Basic Details step you can add the key details of the Patientsection. Start with the First Name, Last Name, Email address, and Mobile Number of the Patient. Add the Doctor and the primary Language of the patient. Next, add Add the Address of the Patient . Click and click the next arrow to proceed.
...
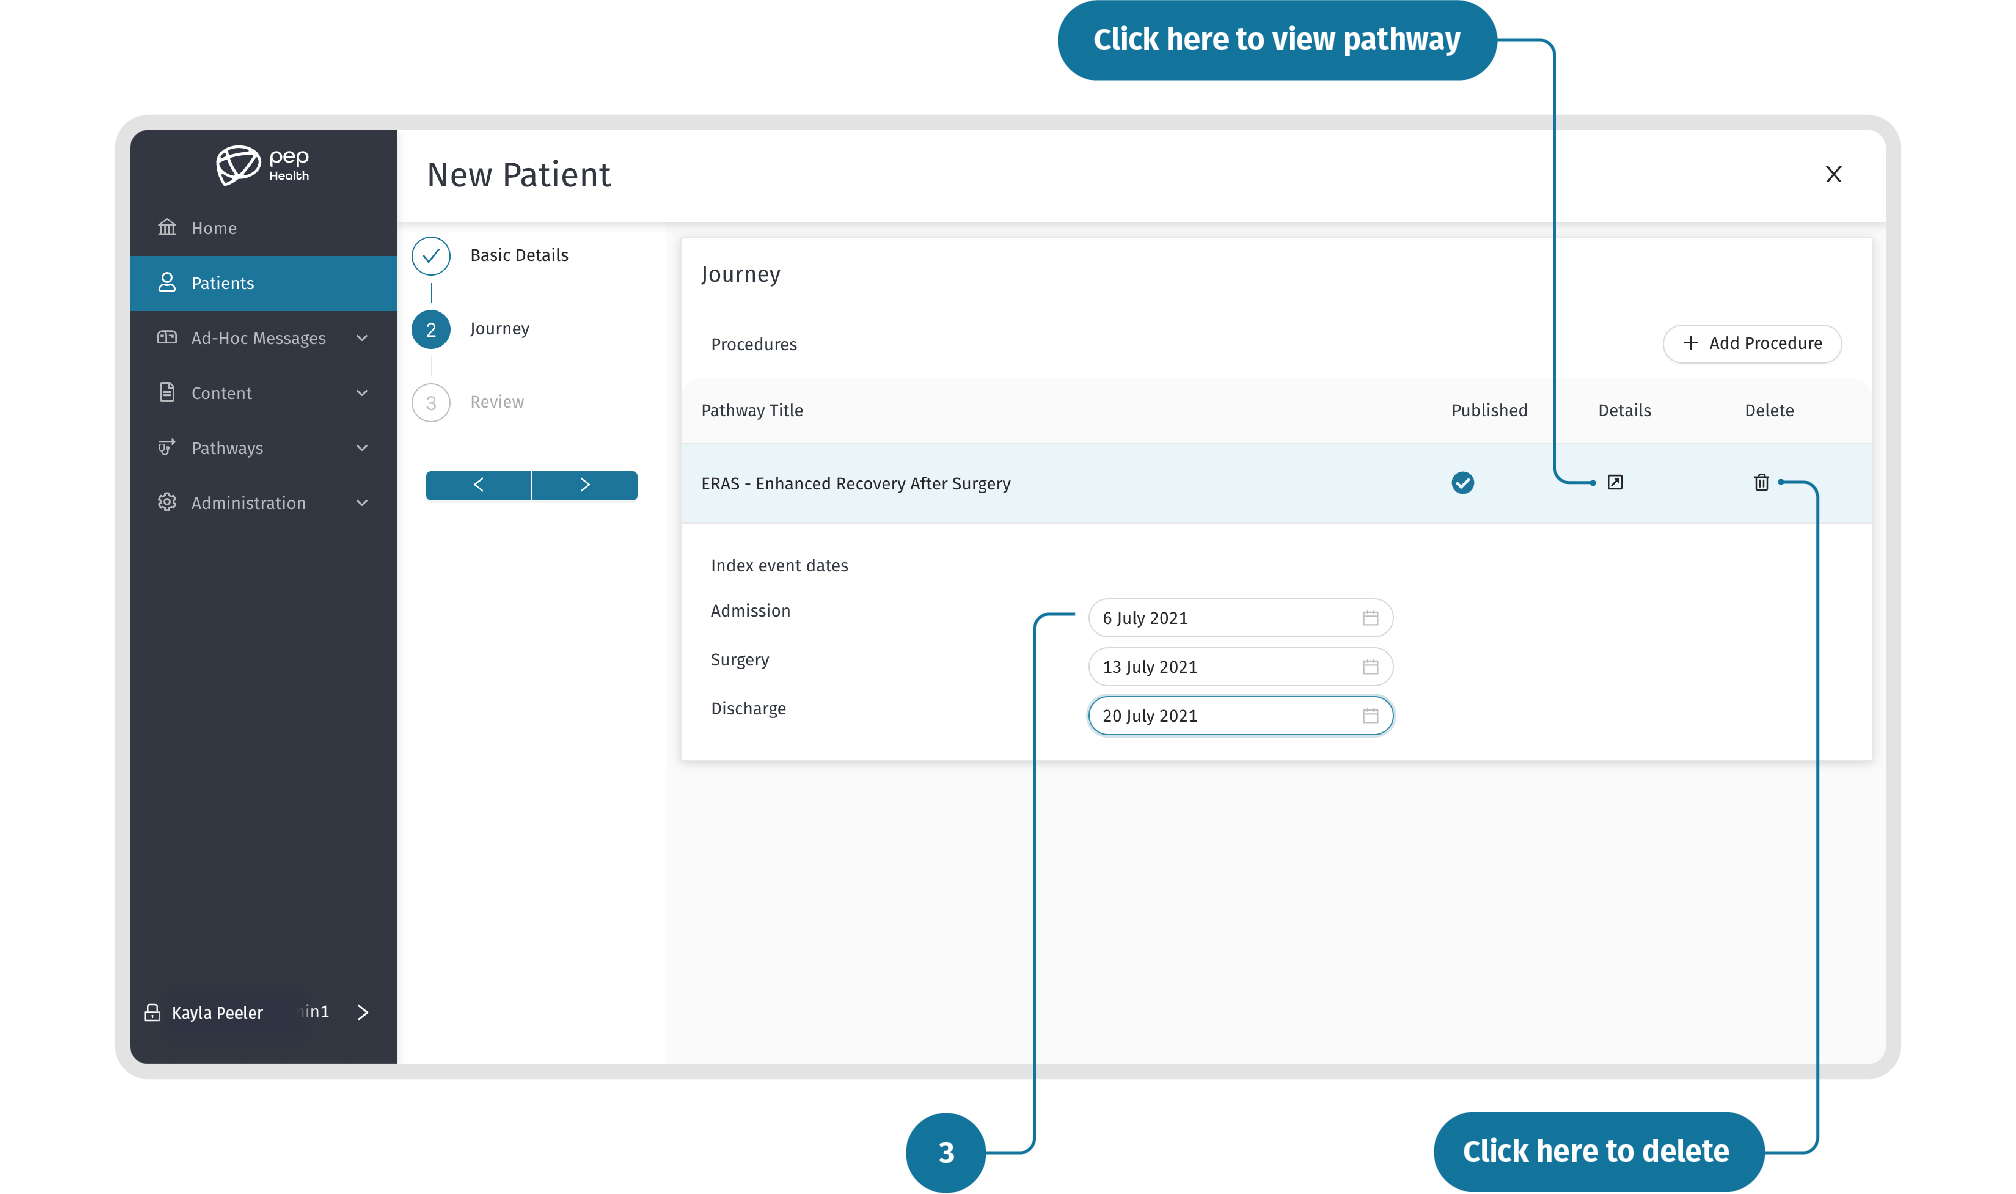
STEP 5: Create a Patient’s Journey
Here you can create the Journey of the Patient by adding Procedure Pathways, by clicking “+Add Procedure” and adding Procedure Pathways. This will allow you to create Patient Pathways within Journeys, and will provide the basis for communications with Patients.
...
Search for and select the Pathway you want, then click “Add”. You can only see Pathways that have been added by the Super Admin to the HospitalOrganisation.
...
You can now add the Index Event dates to the Procedure Pathway.
...
Click the next arrow to proceed.
...
STEP 6: Review the new Patient’s details
Next you can review the details of the Patient. Click on the back arrow to make changes as required.
...
Note:At any time, you can click on the 'X' in the top right corner to close your progress and delete the details added.
Related
...
Articles
| Filter by label (Content by label) | ||||||||||||||||||
|---|---|---|---|---|---|---|---|---|---|---|---|---|---|---|---|---|---|---|
|
| Page Properties | ||
|---|---|---|
| ||
|