| Anchor |
|---|
| Android: Setup for OneSignal |
|---|
| Android: Setup for OneSignal |
|---|
|
OneSignal also works on Android devices. Make sure you have followed the steps in Creating a OneSignal accountbefore completing the Android configuration. - Login to OneSignal.com
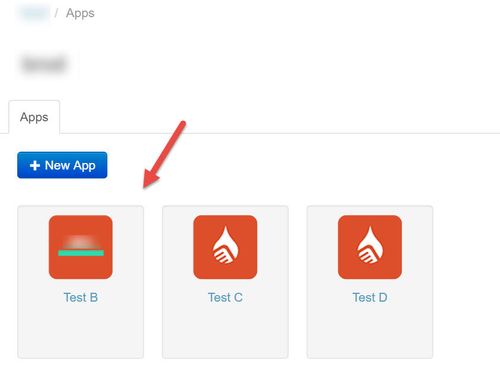
- Select your app entry
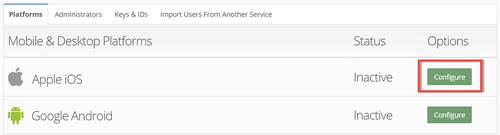
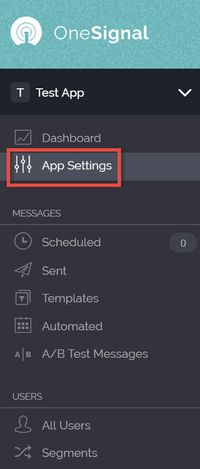
- Click App Settings along the left-hand tab

- Select Configure for Android push notification configuration
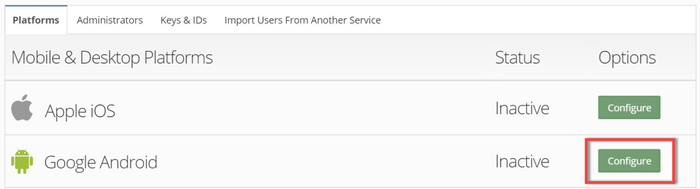
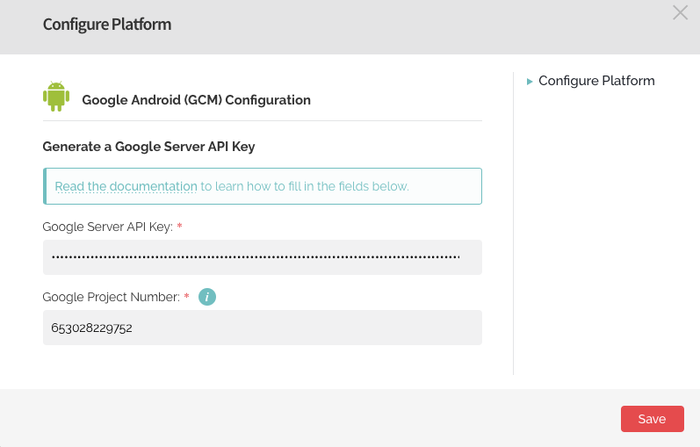
- You will be required to provide Google Server API Key and Google Project Number.
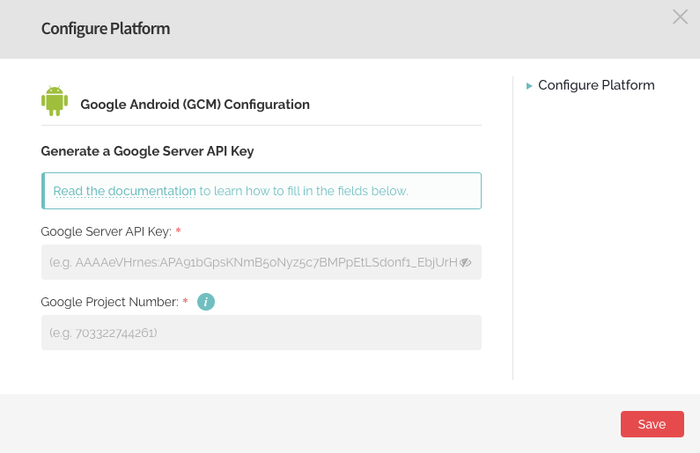
- Open Firebase Console to obtain your Google Server API Key and Google Project Number.
- Once signed-in, you will be taken to a screen to begin filling out your app details. Your App Name should match the app name in Ubiquity and OneSignal.
- Open your desired project (Application) and click on the settings icon.
- Click on Project Settings and then proceed to select Cloud Messaging
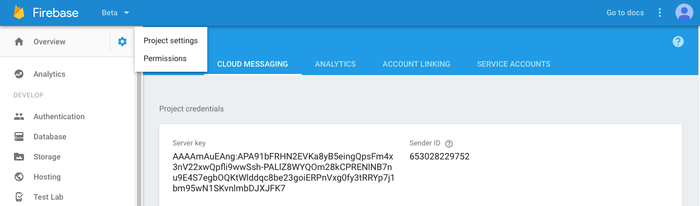
- Copy and paste Server Key and Sender ID from Firebase into your OneSignal account. Click Save to complete your OneSignal configuration.
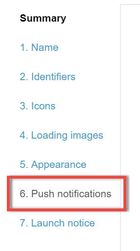
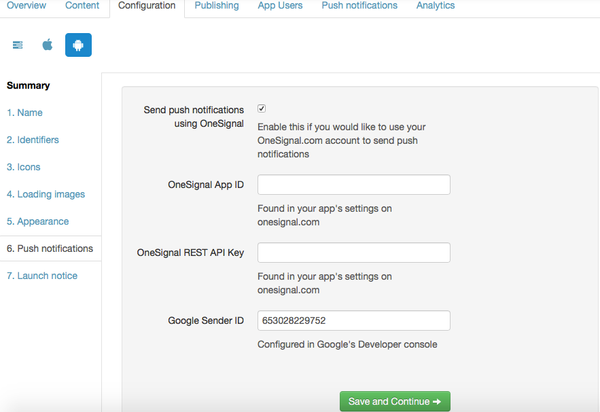
- Open your Ubiquity (Liquid State Cloud) account and click on your app entry. Click on Configuration > Android > Push Notifications as shown below
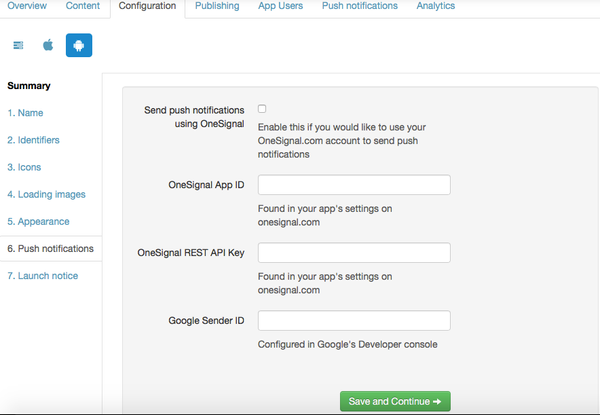
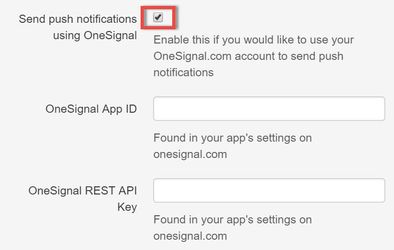
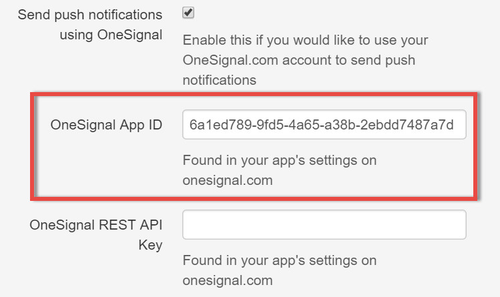
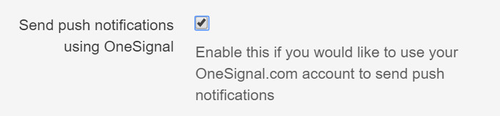
- Select Send Push Notifications using OneSignal. This will allow you to send push notifications to your Android app.
- Copy and Paste your Google Project Number (Firebase) into the field of Google Sender ID (Ubiquity) into your account.
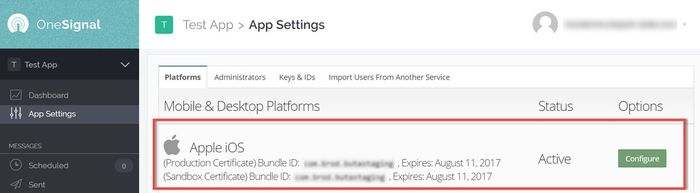
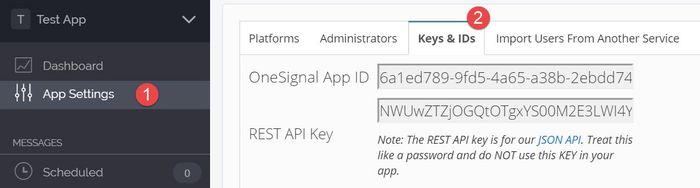
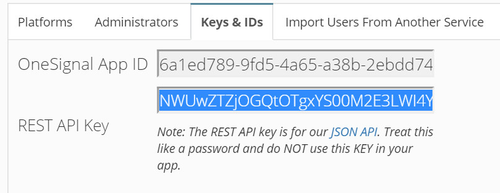
- Navigate back to your OneSignal accountand click App Settings
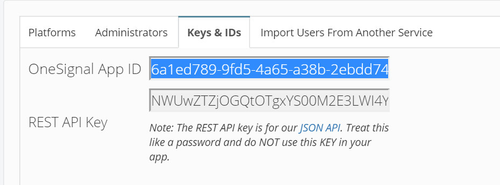
- Click Keys & IDs
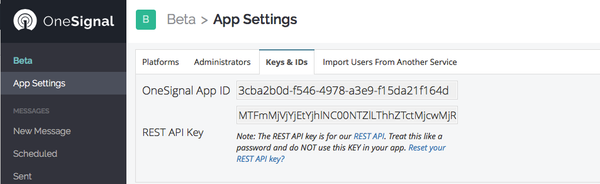
- Copy and Paste OneSignal App ID and REST API Key into Ubiquity.
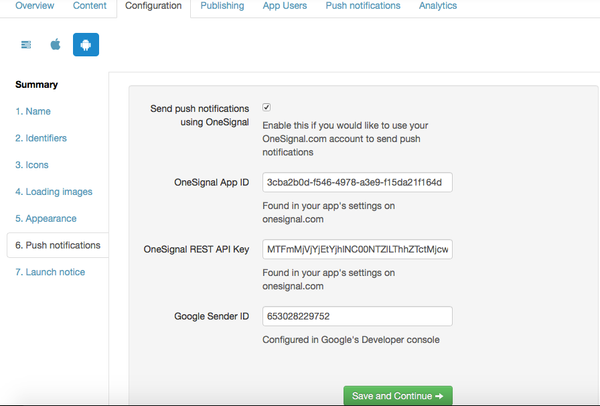
- Click Save and Continue to complete your Android Push Notification configuration
You have now configured your Push Notifications for Android. View instructions for iOS OneSignal configuration or view How to: Send an Instant Push Notification. |