| Panel | ||||||||||
|---|---|---|---|---|---|---|---|---|---|---|
| ||||||||||
|
Overview
iTunes Connect is a web-based administrative tool that allows users to distribute and manage iOS apps. iTunes Connect is a separate resource to the Apple Developer Portal. You can have several iTunes Connect logins within your Apple Developer team. If you are the main account holder of your Apple Developer account, your iTunes Connect login credentials will likely be the same as your Apple Developer login credentials.
iTunes Connect can be accessed at: https://itunesconnect.apple.com
If you only intend to distribute free publications on the App Store, you do not need to activate any additional contracts in iTunes Connect – the iOS Free Applications contract is active by default. If you want to distribute paid apps on the App Store, you must request an iOS Paid Applications Contract.
| title | Request an iOS Paid Applications Contract... |
|---|
request
.
an
optional step, which is not necessary if you are only distributing free apps.To Request an
iOS Paid Applications Contract
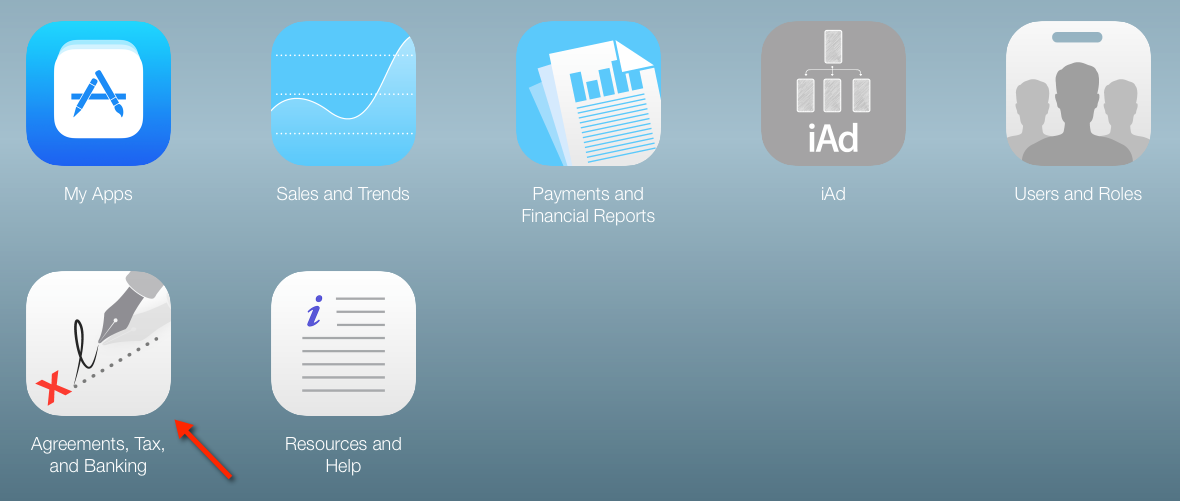
, start by logging in to iTunes Connect with your Apple Developer/iTunes Connect credentials.Click the Agreements, Tax, and Banking option on the main menu.
The Agreements, Tax and Banking page is displayed. This screen is a summary of all the Apple contracts available to you, and those currently open. Find the iOS Paid Applications contract and click the Request button.
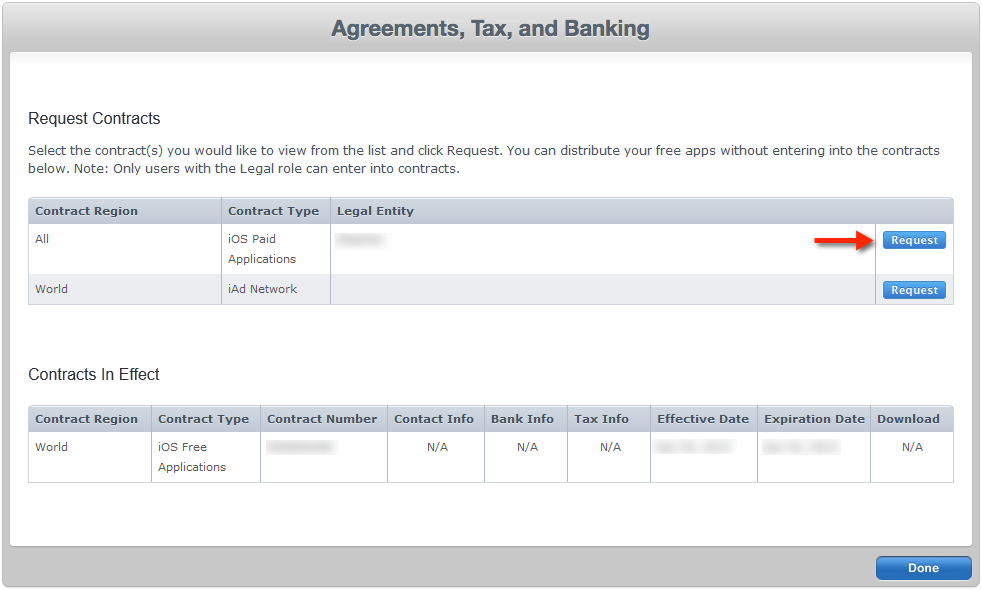
The latest Developer Program License Agreement will appear as an overlay. Tick the Accept box and click I Agree.
Complete the contract, banking and tax info by clicking the respective Set Up buttons in each column.
Your application will be reviewed and processed by Apple. This can take anywhere from a few hours to a few days. Once the iOS Paid Applications contract is activated, it will appear in the Your Contracts in Effect section within Contracts, Tax, and Banking.
Create an iTunes Connect Record
To distribute an app via the App Store, you must configure the app in iTunes Connect. Follow these steps to create an iTunes Connect App Record:Log in
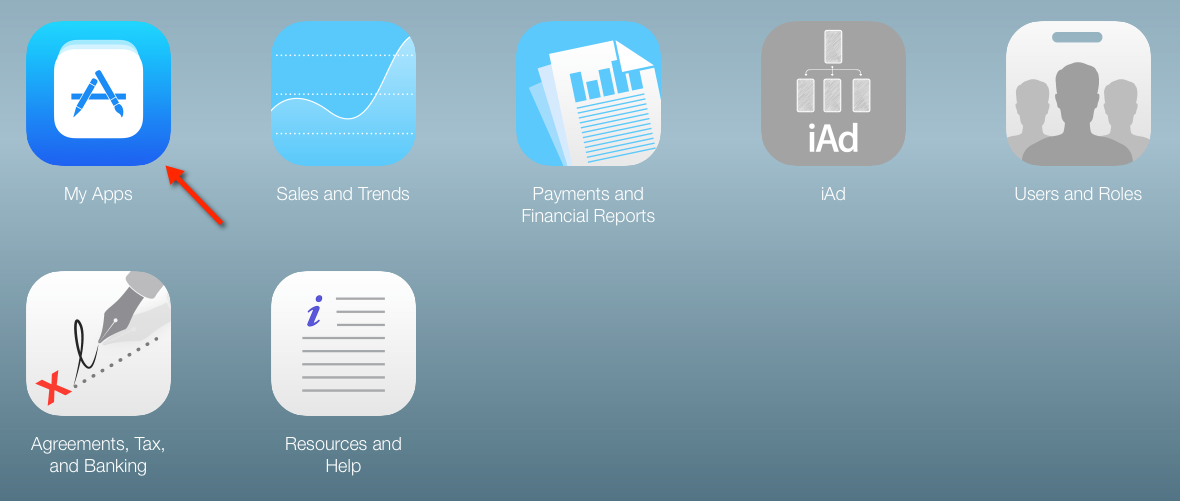
- Login to iTunes Connect
- Click the My Apps link.
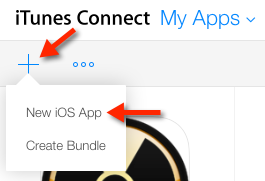
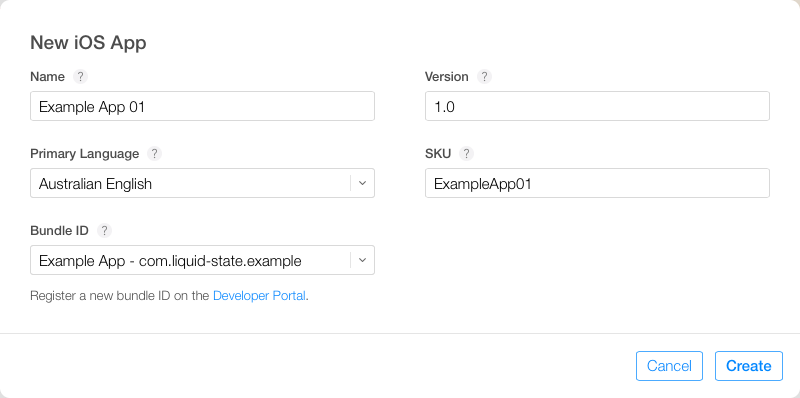
Click the plus symbol ( + ) under the iTunes Connect heading to add a new app. Select the New iOS App option.
You will then need to enter some general information for your app. Enter the following:
- Name - Enter a name for your App Record. This is not the name displayed in the App Store. To ensure clarity, we recommend entering the same name here as you do for the actual App Store app name.
- Version - As this is a new app, you should enter your version as 1.0. You will incrementally increase your version number with subsequent updates to your app.
- Primary Language - Enter the lanuage that your app's content and/or App Record are written in.
- SKU - The SKU is a unique combination of letters and numbers, used to identify your app. Your app's SKU will not be visible in the App Store. Your app's SKU is not editable.
- Bundle
- ID - From the dropdown list, select the app ID you created for your app. If you don't have an app ID available, see iOS Certificates, Identifiers, and Profiles.
- ID - From the dropdown list, select the app ID you created for your app. If you don't have an app ID available, see iOS Certificates, Identifiers, and Profiles.
Once you have entered these details, click Create.
Enter Details for your App Record
At the top of your app's iTunes Connect entry, there are a number of tabs. You will need to enter details and upload assets within these tabs.
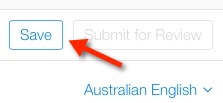
Always remember to save your progress by clicking the Save button at the top-right of page.
Enter information in each tab, as follows:
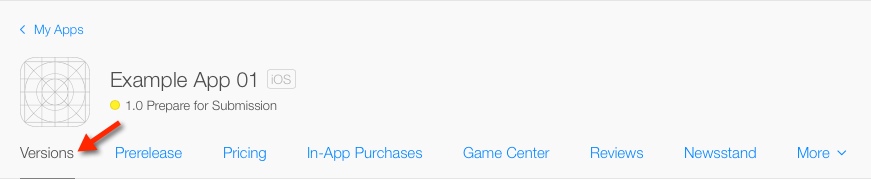
Versions Tab
The Versions tab houses most of your app's essential App Store information and assets. You will be able to update this information if/when you submit updated versions of your app.
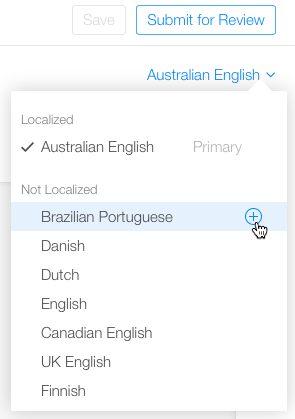
If you want to enter App Store information in different languages, you can create additional language entries here.
| Expand | ||
|---|---|---|
| ||
Click the arrow next to your primary language, towards the top-right of the versions page. Then, hover over your desired language, and click the plus symbol ( + ) that appears. You can then cycle through your chosen languages by selecting them from this dropdown. Images will carry over between languages, but you will need to re-enter text for each option.
|
Version Information
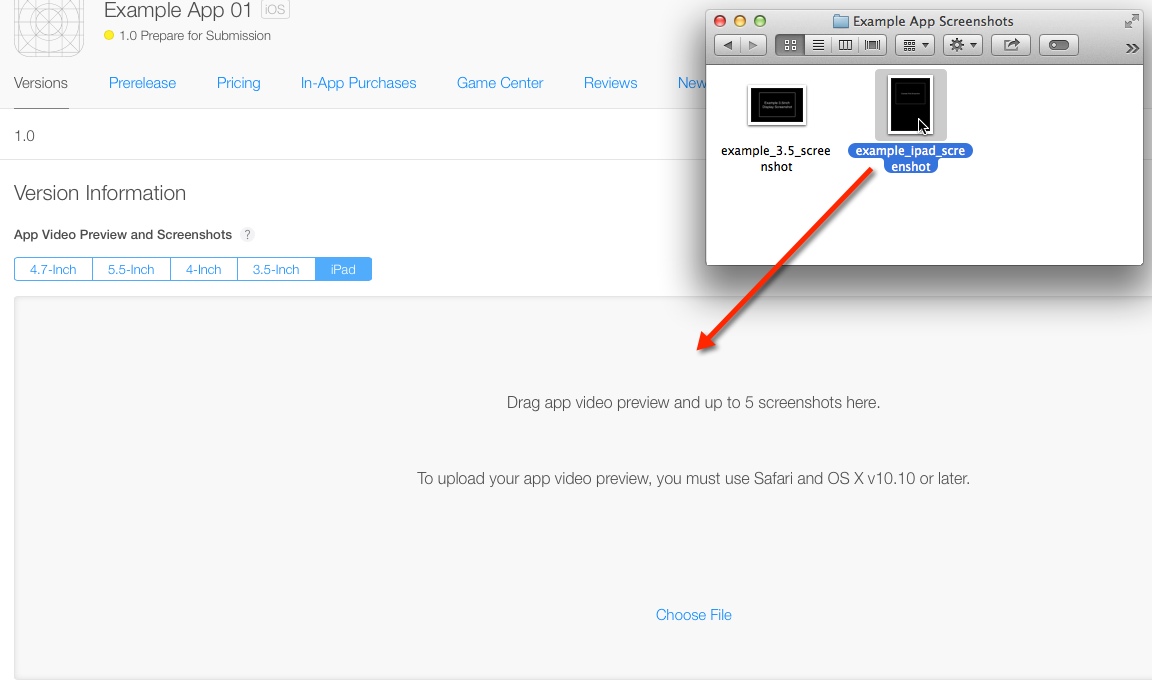
Under the Version Information heading, you will upload some screenshots and enter key information about your app.
You can upload up to five screenshots from your app per device screen size. Each device size can be accessed by clicking the relevant tab.
For most device sizes, you can also upload an app preview video. Simply drag and drop screenshots and video in to the indicated grey area.
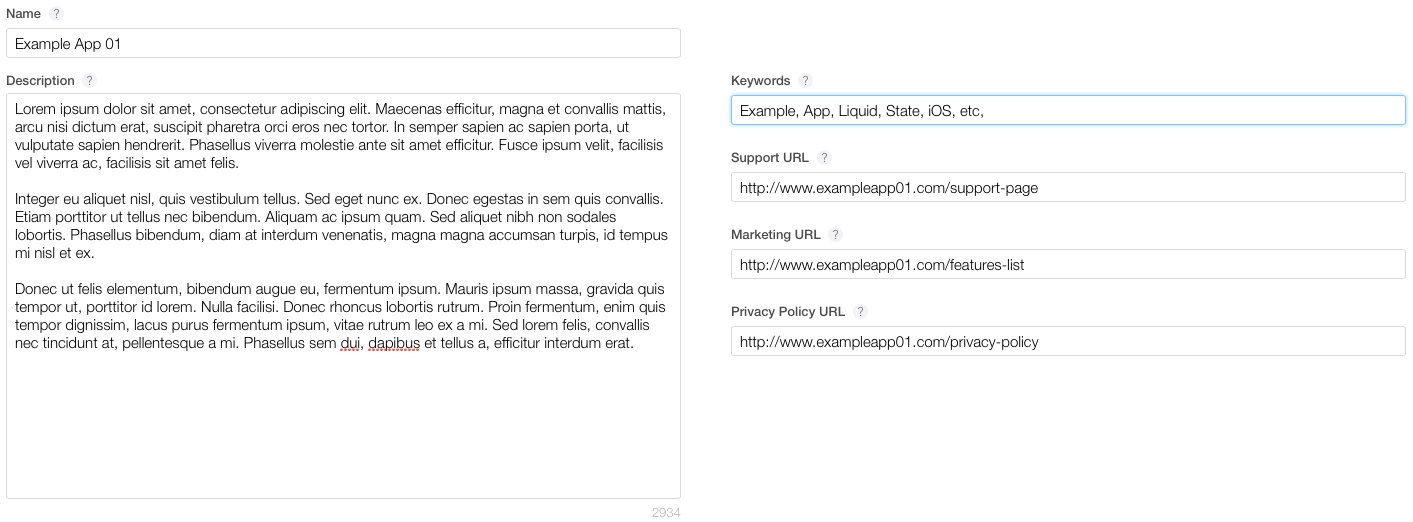
Next, enter your app's name. This is the name that will be displayed in the App Store. Your app's name can be up to 255 characters long.
Enter a description for your app. Again, this description will be visible in the App Store for users to read.
In the keywords section, enter some terms that accurately describe your app. These terms are not visible to users, but are still very important.
Keywords entered here are used to match your App Record against user searches within the App Store. Use commas to separate each keyword.
General App Information
The General App Information section includes more public-facing information for your app.
The app icon is the icon that will be displayed for your App Record in the App Store.
Drag and drop your app icon on to the Choose File section.
![]()
Choose a category (and optionally a secondary category) into which your app fits. It is important to select the most relevant categories in order to effectively target users who browse the App Store by navigating through app categories.
You can edit your app's rating by clicking the Edit button next to the Rating heading.
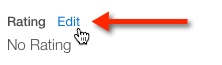
Clicking this link will prompt a popup window to appear, where you can select any content that might change the age rating for your app.
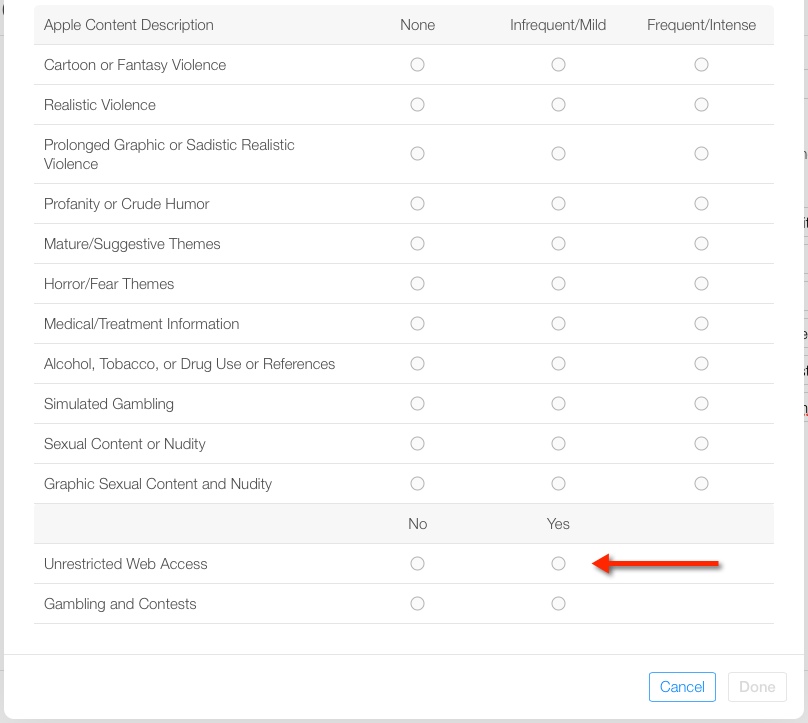
It is important to indicate if any relevant content is included in your app, to ensure your app is not rejected when reviewed by Apple.
Go through and select an option for each type of content. Apple will calculate a rating based on your selections.
| Info |
|---|
Weblinks within Liquid State apps are opened in an in-app browser. Although users cannot enter URLs within this browser, they can follow hyperlinks. There is very little Apple documentation on whether this is considered to be unrestricted browsing, so it is safest to select Unrestricted Web Content if your app includes any external web hyperlinks. |
Build
The Build section of iTunes Connect is used to select your app's binary (.ipa file) once it has been uploaded using Application Loader.
You can continue past this section for now, as you will only need to upload your app's binary once your iTunes Connect entry is fully configured.
Newsstand
Do not enable Newsstand for any app created with Liquid State. Liquid State apps will not function properly as a part of Apple's Newsstand app.
App Review Information
In the App Review Information section, enter details for the individual who Apple should contact during your app's review process, and some notes on your app.
Although leaving notes for review is not always necessary, it can be a good idea.
If you think there are elements of your app that might be confusing or misleading for the Apple representative who reviews your app, you should leave explanations here.
Version Release
Under Version Release, choose whether you want your app to be publicly available on the App Store as soon as it is approved by Apple, or whether you want to manually release it after approval.
Make sure you save your changes before moving on to other tabs.
Prerelease Tab
You can skip this tab, unless you want to set up TestFlight Beta testing for your app.
| Info |
|---|
Once you have completed these steps, and uploaded your app build with Application Loader, your build may go in to a preliminary review stage. If so, your build will be listed in the prerelease tab, prior to becoming available under the Build heading within the Versions tab. |
Pricing Tab
If you are offering your app for free, you do not need to enter any details here. If you want to charge users to download your app, you will need to configure Rights and Pricing for your app.
| Expand | ||
|---|---|---|
| ||
Click on the Pricing tab within your app record. You will be taken to the Rights and Pricing page for your App Record.
If you chose the manual version release option in the Versions tab, you can specify a release date for your app using the Availability Date dropdown menus. To set a price for your app, click the Price Tier dropdown menu, then choose an option. For information on different price tiers, including the net proceeds you will receive for each sale, click the View Pricing Matrix link.
Once you have chosen a price tier, a table will appear, displaying prices across different currencies. You can choose to offer a discounted price for educational institutions by ticking the Discount for Educational Institutions box. We do not recommend ticking the Custom B2B App box. For information on business-to-business apps, please contact Liquid State Support. Click the Save button, then navigate back to your iTunes Connect App Record. |


In-App Purchases Tab
If you wish to offer paid downloadable content within your app, you must define an In-App Purchase (IAP) item for each document being sold.
An example of an IAP could be an individual issue of a magazine, which a user can pay to download from within your app.
To offer IAPs within your app, you must have enabled the In-App Purchase option in your app's production certificate.
| Info |
|---|
Your first iOS IAP must be submitted with a new version of your app. This can be version 1.0. Subsequent IAPs can be submitted independently. |
For information on creating IAPs for iOS, see How to: Create In-App Purchases and iOS In-app Purchases.
Game Centre Tab
Liquid State Apps do not use Game Centre, so you can skip this tab.
Reviews Tab
For now, this tab will be empty. Once your app is active on the iOS App Store, you can come back to this tab to view user reviews of your app.
More Tab
Clicking the More tab will open a dropdown menu. There are a few options within this menu that you may eventually use:
About This App
This section displays some of your app's essential information, such as the app's Primary Language and SKU. You can select a different Bundle ID here. If you do so, make sure you make the same change in Liquid State Ubiquity.
View on App Store
This option is a hyperlink to your app's entry on the App Store. You can copy this link and use it to direct people to your app.
Transfer App
You can ignore this option for now. If you ever want to transfer the ownership of your app to another Apple developer, you can use this tab to complete the relevant process.
Upload and Submit Your App
Once you have completed all of the steps above, you can move on to /wiki/spaces/LSKB/pages/30343244 and uploading your app's .ipa file using Application Loader.
With your app's .ipa file successfully uploaded, navigate back to iTunes Connect.
Enter your app's App Record, then scroll down to the Build heading under the Versions tab.
You can now select to add the build (.ipa file) that you uploaded with Application Loader.
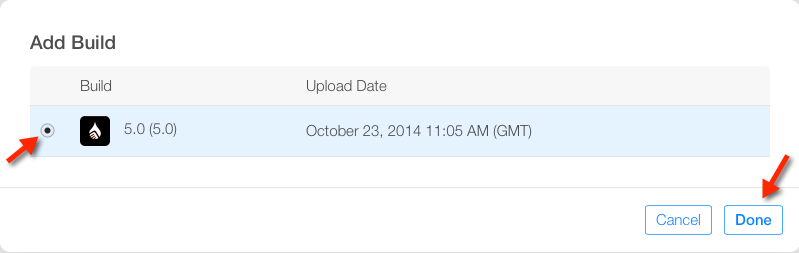
To add the build, click the plus symbol ( + ) next to the Build heading.
| Info |
|---|
If you do not see a plus symbol next to the Builds heading, your build may still be processing. If this is the case, your build will be listed in the Prerelease tab. In this scenario, you can simply wait for your build to become selectable. Try checking back every few hours. |
In the overlay, select your build, then click the Done button.
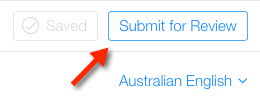
Save your progress, then click the Submit for Review button towards the top of the page.
Your app will now go in to Waiting for Review status. Apple will review your app before approving it for distribution on the iOS App Store. You will receive an email once your app's review is complete.