How to: Configure iOS & Android App
- Oliver Michael (Unlicensed)
- Broderick Gaggi (Unlicensed)
Overview
Apps created in Ubiquity are customisable. To customise the look, feel and features of an app, you must work through some configuration options.
These configuration options include:
- Basic app details, such as the app's display name
- Technical details, such as identifiers that will match the apps entry in platform app stores
- Graphic assets (such as icon and loading screen images in a range of sizes)
All of these configuration details can be completed in the app-level Configuration tab.
Accessing the App Configuration Tab
- Sign in to your Ubiquity.
- Click on the relevant app entry in the Apps tab.
- Click the Configuration tab.

App Level Configuration Overview
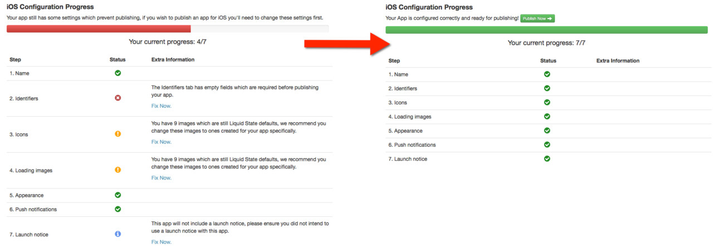
The Overview section of the App Configuration tab displays a snapshot of your app's Configuration Progress.
This progress is broken down by platform, with each platform's section displaying a progress bar.
The progress bar shows whether your app is ready to be published on each platform, or if more steps are required before publishing.
As you complete the configuration steps for each platform, the bars will fill up.

If the bar is red, the app cannot yet be published. An orange bar means the app can be published, but there are some steps you may wish to complete first. A green bar means the app is fully configured and ready for publishing.
Click on the iOS or Android icon to configure the app for the relevant platform.
![]()
Within each platform's configuration section, there are a number of tabs in the left sidebar.
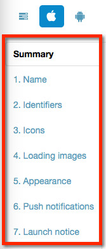
Work through these steps to complete app configuration for the chosen platform.
Ensure you configure the app for all platforms you intend to publish it on.
Details of each step are below:
Summary
The summary tab shows a snapshot of configuration options for the chosen platform.
The status of each step is displayed, as well as any relevant information about unfinished or otherwise problematic steps.
Name
Required for:
There are two different places where an app's name is displayed to the user.
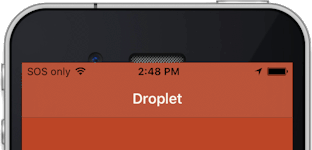
The Name under icon appears beneath the app icon on users' devices. This name is visible to readers when the app is not open. Because the name must fit underneath the icon, it can be a maximum of 13 characters (including spaces).
The App title appears at the top of the main screen of the app, when the app is open. It can be a maximum of 35 characters (including spaces).
Identifiers
The Bundle ID is a unique identifier for your app inside Ubiquity and platform app stores.
For your convenience, Ubiquity automatically generates a Bundle ID for each app.
We recommend copying the automatically generated Bundle ID directly from your Ubiquity to the Apple Developer Portal and/or Google Play Developer Console, when publishing your app.
If you wish to change your app's Bundle ID, be aware that Bundle IDs can only contain letters, numbers and dots (no spaces or other special characters are allowed). The preferred format for a Bundle ID is com.companyname.appname. For example: com.liquidstate.liquidapp.
Changing the Bundle ID is only recommended for advanced users. If you have already published your app using a certain Bundle ID, we warn against changing the Bundle ID, as platform App Stores will no longer recognise it as the same app.
The Organisation ID is generated by Apple and identifies your company within the Apple Developer Program.
The Organisation ID is only required for iOS configuration.
Your Organisation ID is also referred to as the Team ID.
You must copy your Organisation ID from the Apple Developer Portal, and paste it in to this field.
To obtain an Organisation ID, you must have an iOS Developer account (or an Apple Enterprise account).
To get your Organisation ID:
- Sign in to your account in the Apple Developer portal.
- In the sidebar, click Membership.
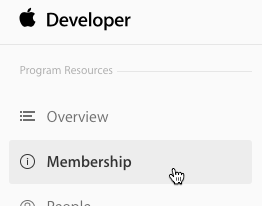
- Your Organisation ID is referred to as the Team ID under the Membership Information heading.
Icons
App icons are used to represent your app on devices' home screens.
A number of different icon image sizes are required for each platform, in order to cater for the range of screen sizes and densities that the app might be viewed on.
The Ubiquity system provides placeholder icons. However, you must create and upload genuine icons for the app before submitting it to app stores.
Icon images should be in PNG format, at 72DPI.
Once you have completed all of the necessary steps for your app configuration, you will still need to configure the documents within your app, and even some details for individual app pages.
For more information, see:
Unless otherwise indicated in the Overview page of this WIKI the information contained within this space is Classified according to the /wiki/spaces/ISMS/pages/739344530 as |
INTERNAL |